Homelab Update - Proxmox
homelab linux Over the past few days i’ve been upgrading my homelab setup. The biggest change - ditching ESXi for open source, KVM hypervisor Proxmox! I wanted to try something with better storage support (proxmox is debian-based and supports ZFS and more flexibility for my non-production environment.
Below are some of the “gotchas” I faced when getting Proxmox up and running!
Remove Enterprise Apt Repository
Running an apt update will fail out-of-the-box, as by default Proxmox is set to pull from the Enterprise apt repos. See the Proxmox wiki for more details. Here are the abbreviated steps on how to fix this:
You’ll want to comment out the line in /etc/apt/sources.list.d/pve-enterprise.list.
Now add the following repo to /etc/apt/sources.list.
deb http://download.proxmox.com/debian/pve buster pve-no-subscription
Adding Second NIC to Proxmox
tags: proxmox new nic no internet, no flashing lights
I recently added a new dual NIC to my existing proxmox machine. I found I wasn’t able to connect to proxmox via my existing motherboard’s network interface.
I saw that both the new (Intel x2) and old interface (Realtek) were all being detected.
root@proxmox:/# lspci
...
...
01:00.0 Ethernet controller: Intel Corporation 82571EB Gigabit Ethernet Controller (rev 06)
01:00.1 Ethernet controller: Intel Corporation 82571EB Gigabit Ethernet Controller (rev 06)
02:00.0 Ethernet controller: Realtek Semiconductor Co., Ltd. RTL8111/8168/8411 PCI Express Gigabit Ethernet Controller (rev 16)
root@proxmox:/# dmesg | grep eth | head -n 30
   3.512907 r8169 0000:02:00.0 eth0: RTL8168h/8111h, b4:2e:99:3c:a1:11, XID 541, IRQ 127
   3.512908 r8169 0000:02:00.0 eth0: jumbo features [frames: 9200 bytes, tx checksumming: ko]
   3.513604 r8169 0000:02:00.0 enp2s0: renamed from eth0
   3.663348 e1000e 0000:01:00.0 eth0: (PCI Express:2.5GT/s:Width x4) 00:15:17:6c:cc:55
   3.663349 e1000e 0000:01:00.0 eth0: Intel(R) PRO/1000 Network Connection
   3.663430 e1000e 0000:01:00.0 eth0: MAC: 0, PHY: 4, PBA No: C57721-005
   3.827424 e1000e 0000:01:00.1 eth1: (PCI Express:2.5GT/s:Width x4) 00:15:17:6c:cc:56
   3.827425 e1000e 0000:01:00.1 eth1: Intel(R) PRO/1000 Network Connection
   3.827509 e1000e 0000:01:00.1 eth1: MAC: 0, PHY: 4, PBA No: C57721-005
   3.828068 e1000e 0000:01:00.0 enp1s0f0: renamed from eth0
   3.847163 e1000e 0000:01:00.1 enp1s0f1: renamed from eth1
You can see that my existing (Realtek) ethernet controller had been renamed to enp2s0, and my new network card had taken the “1” place. This renaming was the cause of my issue.
Looking at /etc/network/interfaces, I saw that I needed to fix the bridge-ports entry on vmbr0 to my interface’s new name.
Below shows a snippet of my corrected interfaces file - now bridging my enp1s0f0 interface to the proxmox virtual interface.
iface enp2s0 inet manual
#MOBO RJ-45

iface enp1s0f0 inet manual
#RIGHT RJ-45

iface enp1s0f1 inet manual
#LEFT RJ-45

auto vmbr0
iface vmbr0 inet static
	address 10.1.0.11/24
	gateway 10.1.0.1
	bridge-ports enp1s0f0
	bridge-stp off
	bridge-fd 0
#WAN
I then simply bring the interface up with ifup enp2s0.
Encrypt ZFS dataset
I wanted a volume (ZFS called these “datasets”) on my ZFS drives to be encrypted. Proxmox has some documention on zfs encryption which I recommend reading first.
For context, i’d already created a MIRRORED zpool in Proxmox GUI with my two 2TB physical drives. The pool is called bulk.
root@proxmox:/# zpool status
  pool: bulk
 state: ONLINE
  scan: none requested
config:

	NAME        STATE     READ WRITE CKSUM
	bulk        ONLINE       0     0     0
	  mirror-0  ONLINE       0     0     0
	    sdb     ONLINE       0     0     0
	    sdc     ONLINE       0     0     0
From your proxmox instance, instantiate a new zfs dataset and enable encryption.
root@proxmox:/# zfs create -o encryption=on -o keyformat=passphrase keylocation=prompt bulk/secure
Let Proxmox VE know about this new dataset.
root@proxmox:/# pvesm add zfspool bulk-secure -pool bulk/secure
You can check your work like so. All child datasets from bulk/secure should also inherit these settings.
root@proxmox:/# zfs get encryption bulk
NAME  PROPERTY    VALUE        SOURCE
bulk  encryption  off          default
root@proxmox:/# zfs get encryption bulk/secure
NAME         PROPERTY    VALUE        SOURCE
bulk/secure  encryption  aes-256-ccm  -
root@proxmox:/bulk/secure# zfs list
NAME          USED  AVAIL     REFER  MOUNTPOINT
bulk         1.15M  1.76T       96K  /bulk
bulk/secure   196K  1.76T      196K  /bulk/secure
Mounting Volume
zfs load-key -a
# Enter password

zfs mount bulk/secure
Pulling linux container
Proxmox has native support for LXC (Linux Containers).
In a Proxmox shell, check what containers are preloaded with pveam available.
root@proxmox:/mnt# pveam available | grep ubuntu
system          ubuntu-16.04-standard_16.04.5-1_amd64.tar.gz
system          ubuntu-18.04-standard_18.04.1-1_amd64.tar.gz
system          ubuntu-19.04-standard_19.04-1_amd64.tar.gz
system          ubuntu-19.10-standard_19.10-1_amd64.tar.gz
Before using a container, you’ll need to download it.
pveam download local ubuntu-19.10-standard_19.10-1_amd64.tar.gz
Your container should now be availble in the Proxmox GUI!
Locale issues in debian-based LXC container
I sometimes see locale errors a lot in fresh debian LXC containers (esp. when running apt). I’ve found reinstalling locales and configuring it with your own locale (en-US for me).
apt install --reinstall --purge locales
dpkg-reconfigure locales
Enter a Linux Container from Proxmox SSH
Quick one! This is the equivalent of docker exec -it <container name> /bin/bash.
root@proxmox:/# pct enter 102

root@storage:/#
You can get the container ID either from the proxmox web GUI, or from pct list.
Setting Up Time Machine Backups
Lots of guides online seem outdated on enabling time machine on linux. Since Samba 4.8 we’ve been able to advertise sambda shares as time capsules - and it’s very easy!
Proxmox GUI Setup
- Create an Ubuntu container.
- Mount a ZFS share from Proxmox GUI to any mountpoint (
/timemachine).
Container Setup
- Create user with no shell
useradd tmachine --shell /bin/false - Change owner of mounted drive
chown tmachine: /timemachine - Install dependencies
apt install samba avahi-daemon
Samba Setup
In /etc/samba/smb.conf :
[timemachine]
    comment = Time Machine
    path = /timemachine
    browseable = yes
    writeable = yes
    create mask = 0600
    directory mask = 0700
    spotlight = yes
    vfs objects = catia fruit streams_xattr
    fruit:aapl = yes
    fruit:time machine = yes
    valid users=tmachine
-
Set a password for our user with
smbpasswd -a tmachine -
Restart samba
sudo systemctl restart smbd -
Allow Samba ports through relevant firewalls
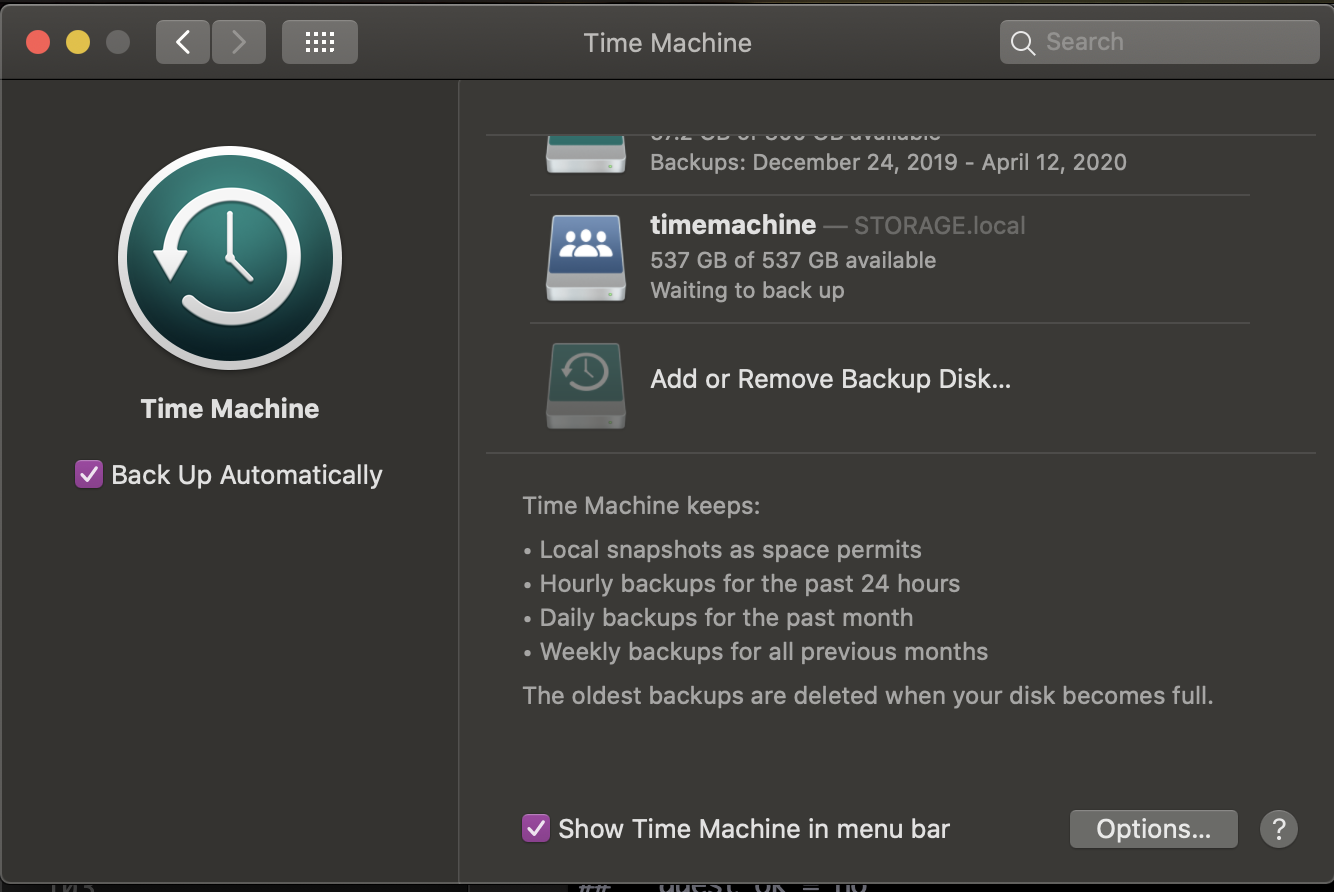
All set! You should now see your share in time machine when on the same local network.
Have a comment? Join the discussion
This post helpful? Buy me a coffee!