Spotify "Now Playing" with AWS Lambda
spotify aws music UPDATE: In August 2021 I released a revised version of this project that runs on Azure.
I really love the social media aspect that Spotify brings to music. I discover so many great tracks by
exploring what my friends listen to. I’ve been really curious about uses for AWS Lambda and what it can accomplish.
Let’s get started!
If you’re curious what the finished product looks like, look up! My header should say something like:

Overview
In this guide we will be hosting a function on AWS Lambda, and using Spotify’s web API to return a JSON object with the user’s current or last played Spotify track. We will utilize Amazon’s API Gateway to create a REST endpoint that can be used anywhere (I use it on my personal website) to serve dynamic content to static pages. I wrote the lambda function in python, but this should be easily adaptable to work with any language.
Prereqs
- AWS Account (Free Tier)
- Spotify account (Premium)
- Domain to point API at (Optional)
Create Spotify Developer Account
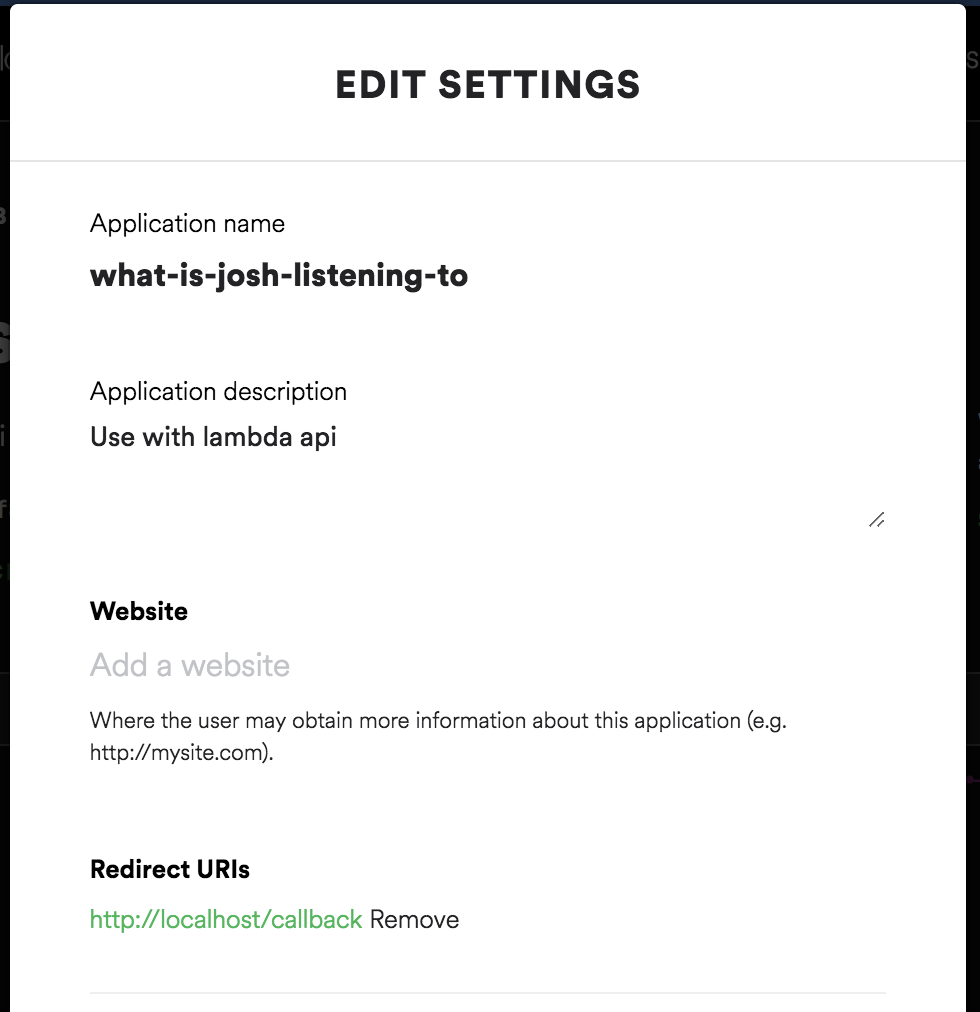
The first step is to visit the Spotify developer dashboard and create a new project. This process will grant you a
Client ID and Client Secret. You’ll need to base64 encode these two values with a colon separating them.
Encoding the token can be done by this simple shell command.
echo -n <clientId>:<clientSecret> | base64You’ll also need to add a callback URI. For this tutorial it doesn’t matter what the URI is,
as long as you set one and it’s consistent in all the following steps. I used http://localhost/callback.
Generate Refresh Token
Spotify’s API requires direct user authorization to access information like current track.
User resources can only be requested by that user, so this means we need to be logged
in as ourselves in order to get the information we need. The problem with this is that Spotify authorization
tokens only last 60 minutes, so we would typically need to log in hourly in order to keep this running. By requesting a
refresh token and writing some code, we can continually grant ourselves a new access token without any user interaction.
For more info on Spotify API authorization flows, check out their guide.
You’ll need a refresh token to kick everything off, which you can generate by simply asking Spotify for it.
Make sure to provide the correct scopes user-read-currently-playing, user-read-playback-state, user-read-recently-played , etc as needed.
Visit this URL with your information filled in. This is where Spotify will ask you to login.
After successfully authenticating, you’ll see an access code in the URL. Save that for the next step.
https://accounts.spotify.com/authorize?client_id=<YOUR CLIENT ID>&redirect_uri=<YOUR REDIRECT URI>&response_type=code&scope=<YOUR SCOPES>
Issue this curl command in terminal with the access code you just generated.
curl -H "Authorization: Basic <YOUR BASE-64'd APP TOKEN>" -d grant_type=authorization_code -d code=<YOUR ACCESS CODE> -d redirect_uri=<YOUR CALLBACK URL> https://accounts.spotify.com/api/token`You should now have a refresh token. We can use this python function to then receive a new access token, given a refresh token and client information. This function places the newly fetched access token, as well as some metadata, into a database (more on that later).
# Only called if the current accessToken is expired (on first visit after ~1hr)

def refreshTheToken(refreshToken):

    clientIdClientSecret = 'Basic <YOUR BASE-64d APP TOKEN>'
    data = {'grant_type': 'refresh_token', 'refresh_token': refreshToken}

    headers = {'Authorization': clientIdClientSecret}
    p = requests.post('https://accounts.spotify.com/api/token', data=data, headers=headers)

    spotifyToken = p.json()

    # Place the expiration time (current time + almost an hour), and access token into the DB
    table.put_item(Item={'spotify': 'prod', 'expiresAt': int(time.time()) + 3200,
                                        'accessToken': spotifyToken['access_token']})
Start a new Lambda Project
Lambda, for those unfamiliar, is a compute platform that allows you to run code in the cloud without
the hassle of configuring an entire server instance. Code can be running by hitting a REST endpoint.
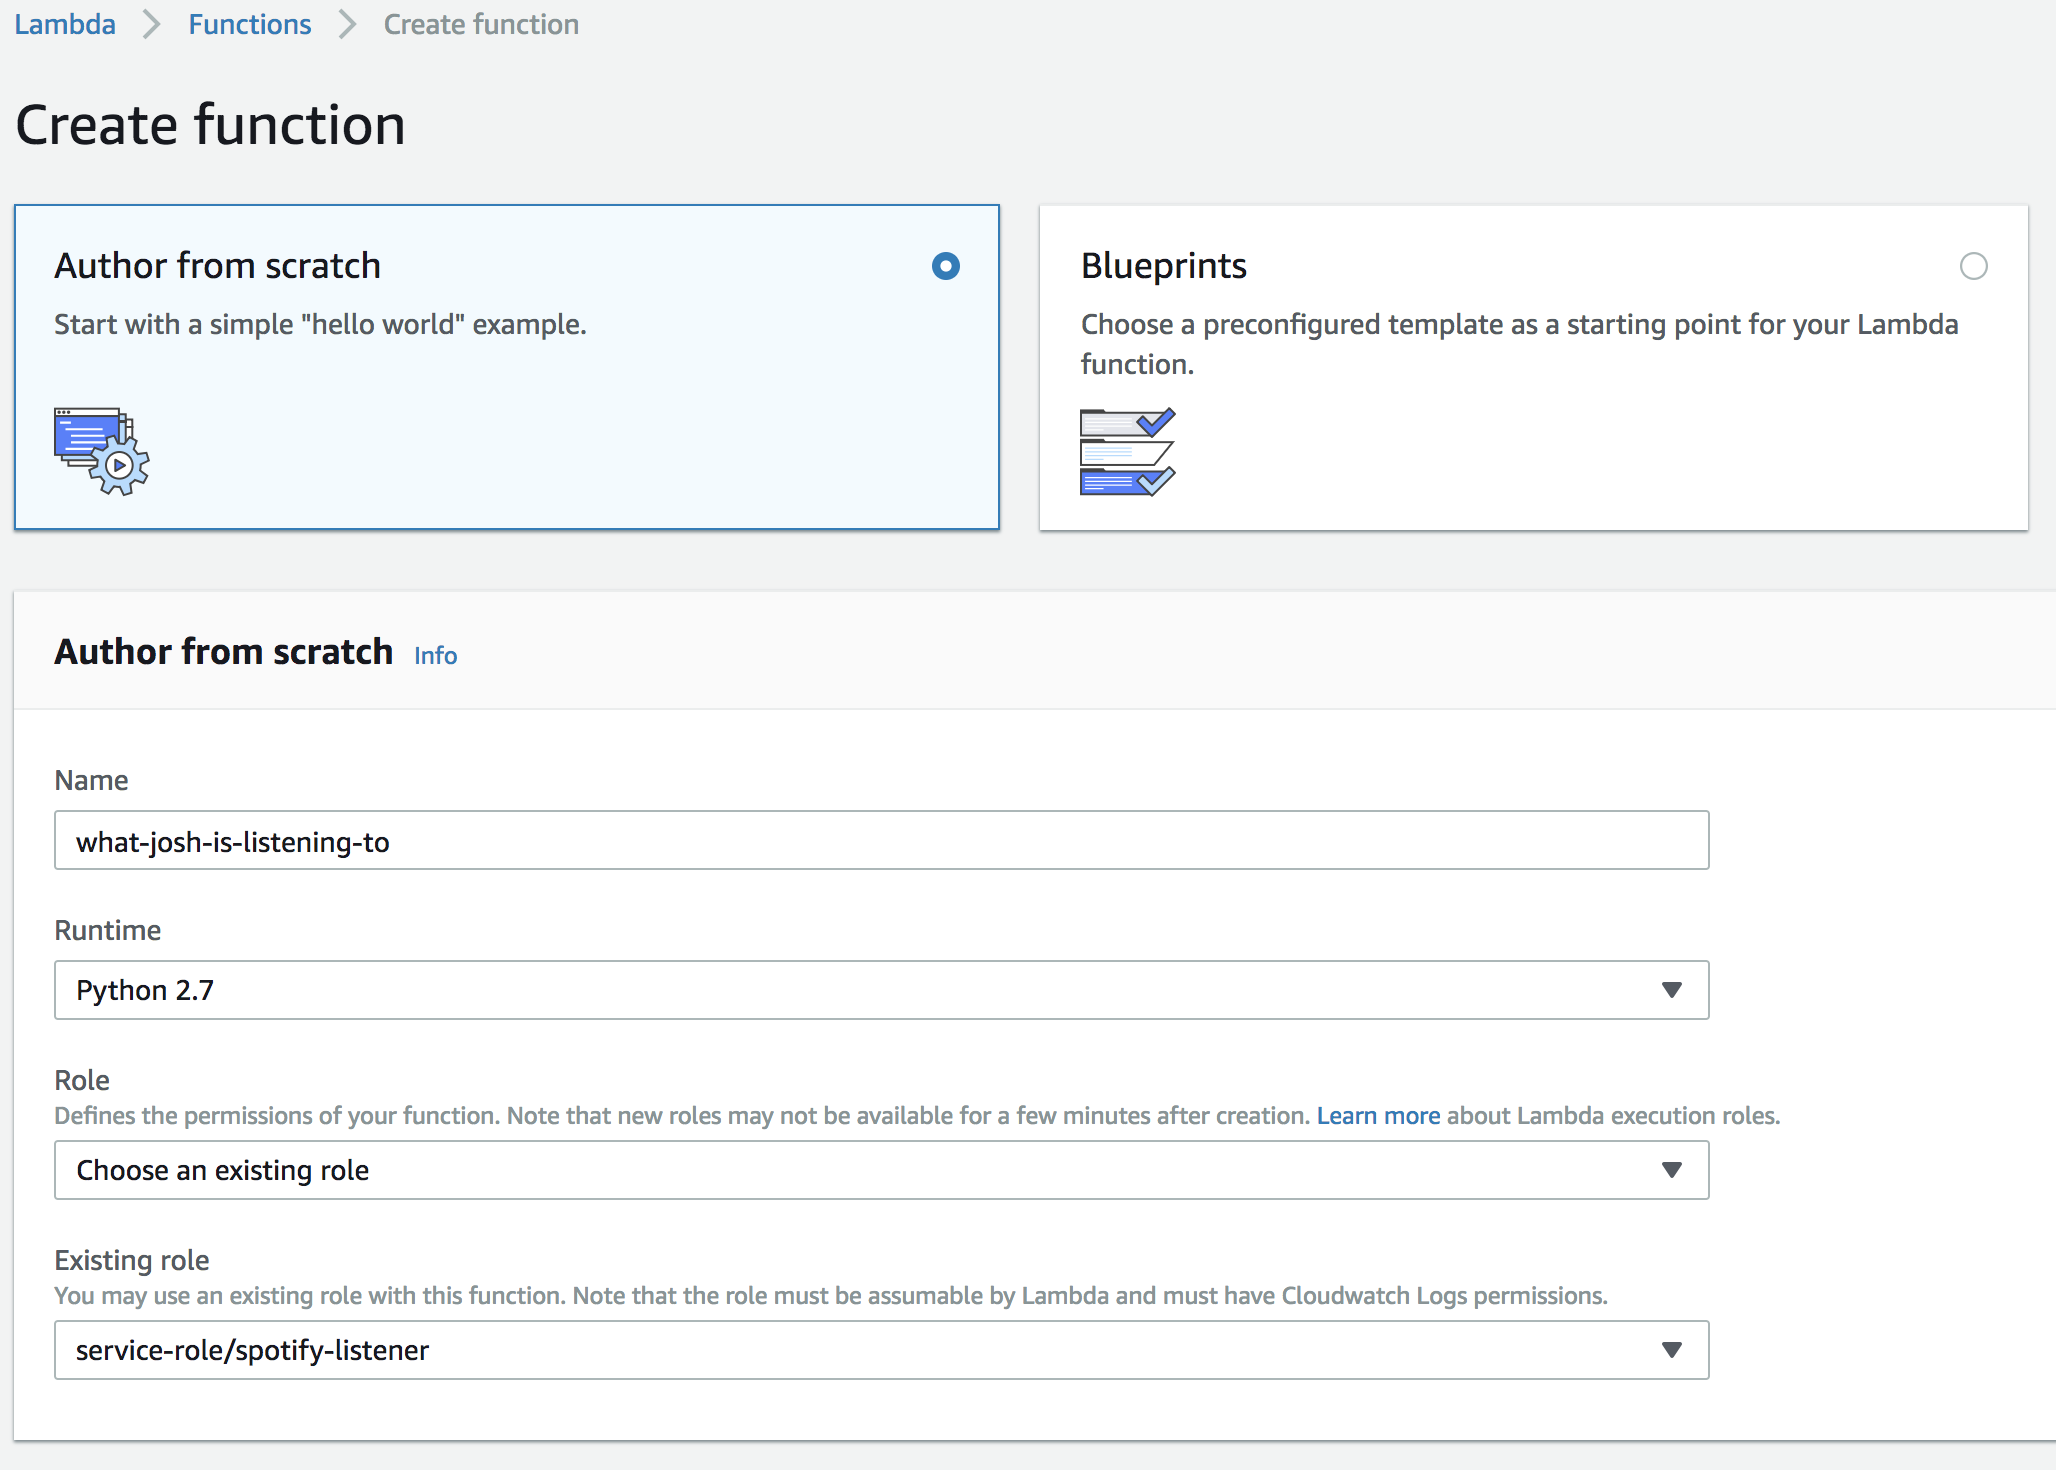
Navigate to the AWS Lambda page and create a new function. I’ll be making my function in region us-east-2, and writing the program in
python 2. Create a role that permits basic Amazon Lambda execution, as well as Dynamo DB access (you’ll need that later). I named my role spotify-listener.
Configuring Python Environment
Before we can continue we need to upload all the dependencies of our project into lambda so we can use them later when we start writing code. Luckily the only
dependency not pre-packaged in the lambda environment is an HTTP requests package.
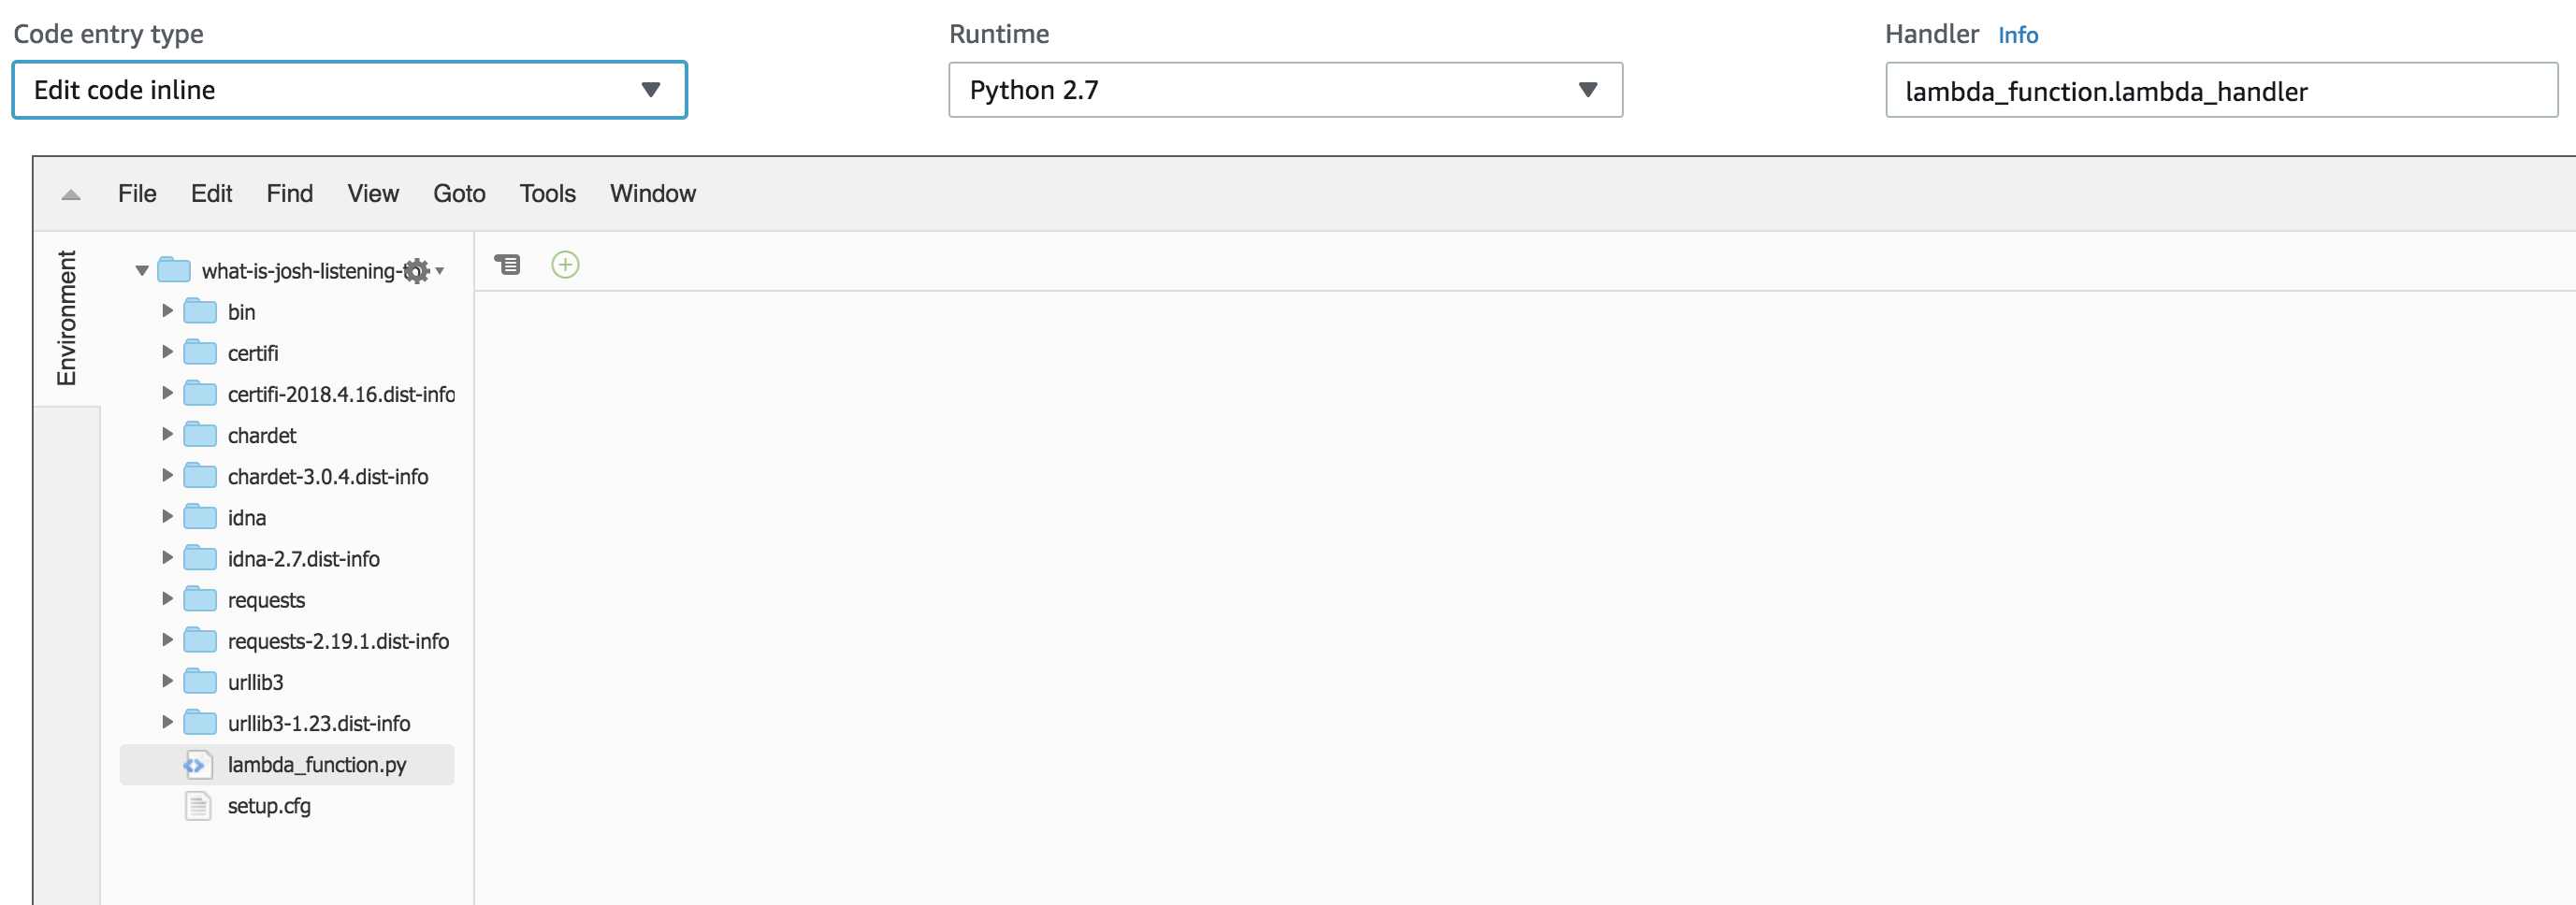
I chose to use requests. You’ll need to first download the package and its dependencies with pip. Save these files into a temporary directory.
pip install requests -t /path/to/a-tmp-dirIf you’re using a Mac and have installed pip with Homebrew (like me), you’ll need to create a file in your temporary directory titled setup.cfg with the following contents. For more info, check out this post on Creating a Deployment Package for Lambda (Python).
[install]
prefix=
Create a zip file, and upload this to your lambda function’s dashboard. Now we can swap to Edit Code inline mode. Create a .py file to match your function’ handler field. Your environment should now look like this:
DynamoDB
I ran into a problem where I wanted to have the ability to persist access tokens between API calls. Each access token is valid for an hour,
so it felt like a waste to refresh the token on each API call. Lambda has integration with many of AWS’s services, one of which is DynamoDB.
Visit the dynamoDB page and create a new table. The names do not matter, just make sure they stay consistent throughout the tutorial.

You’ll then need to add two additional keys: accessToken and expiresAt.
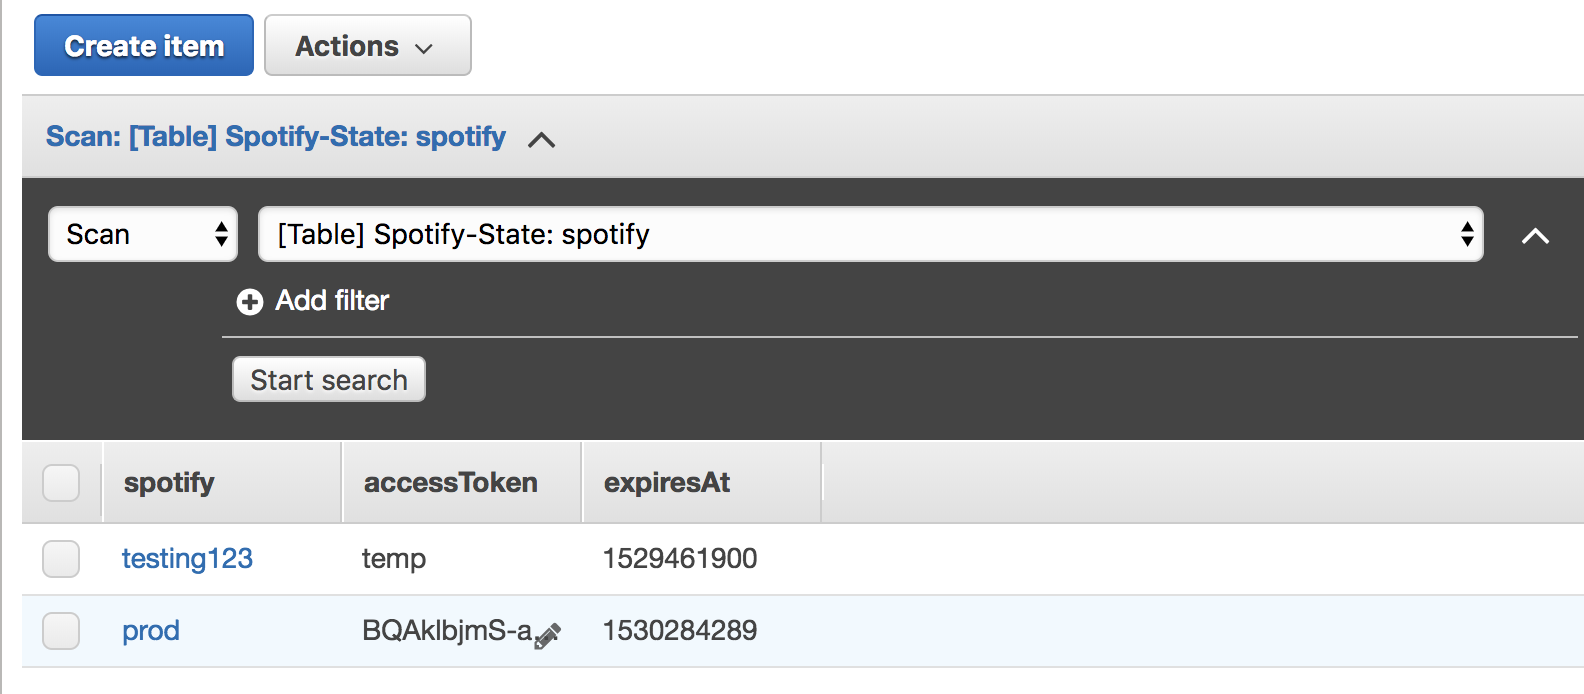
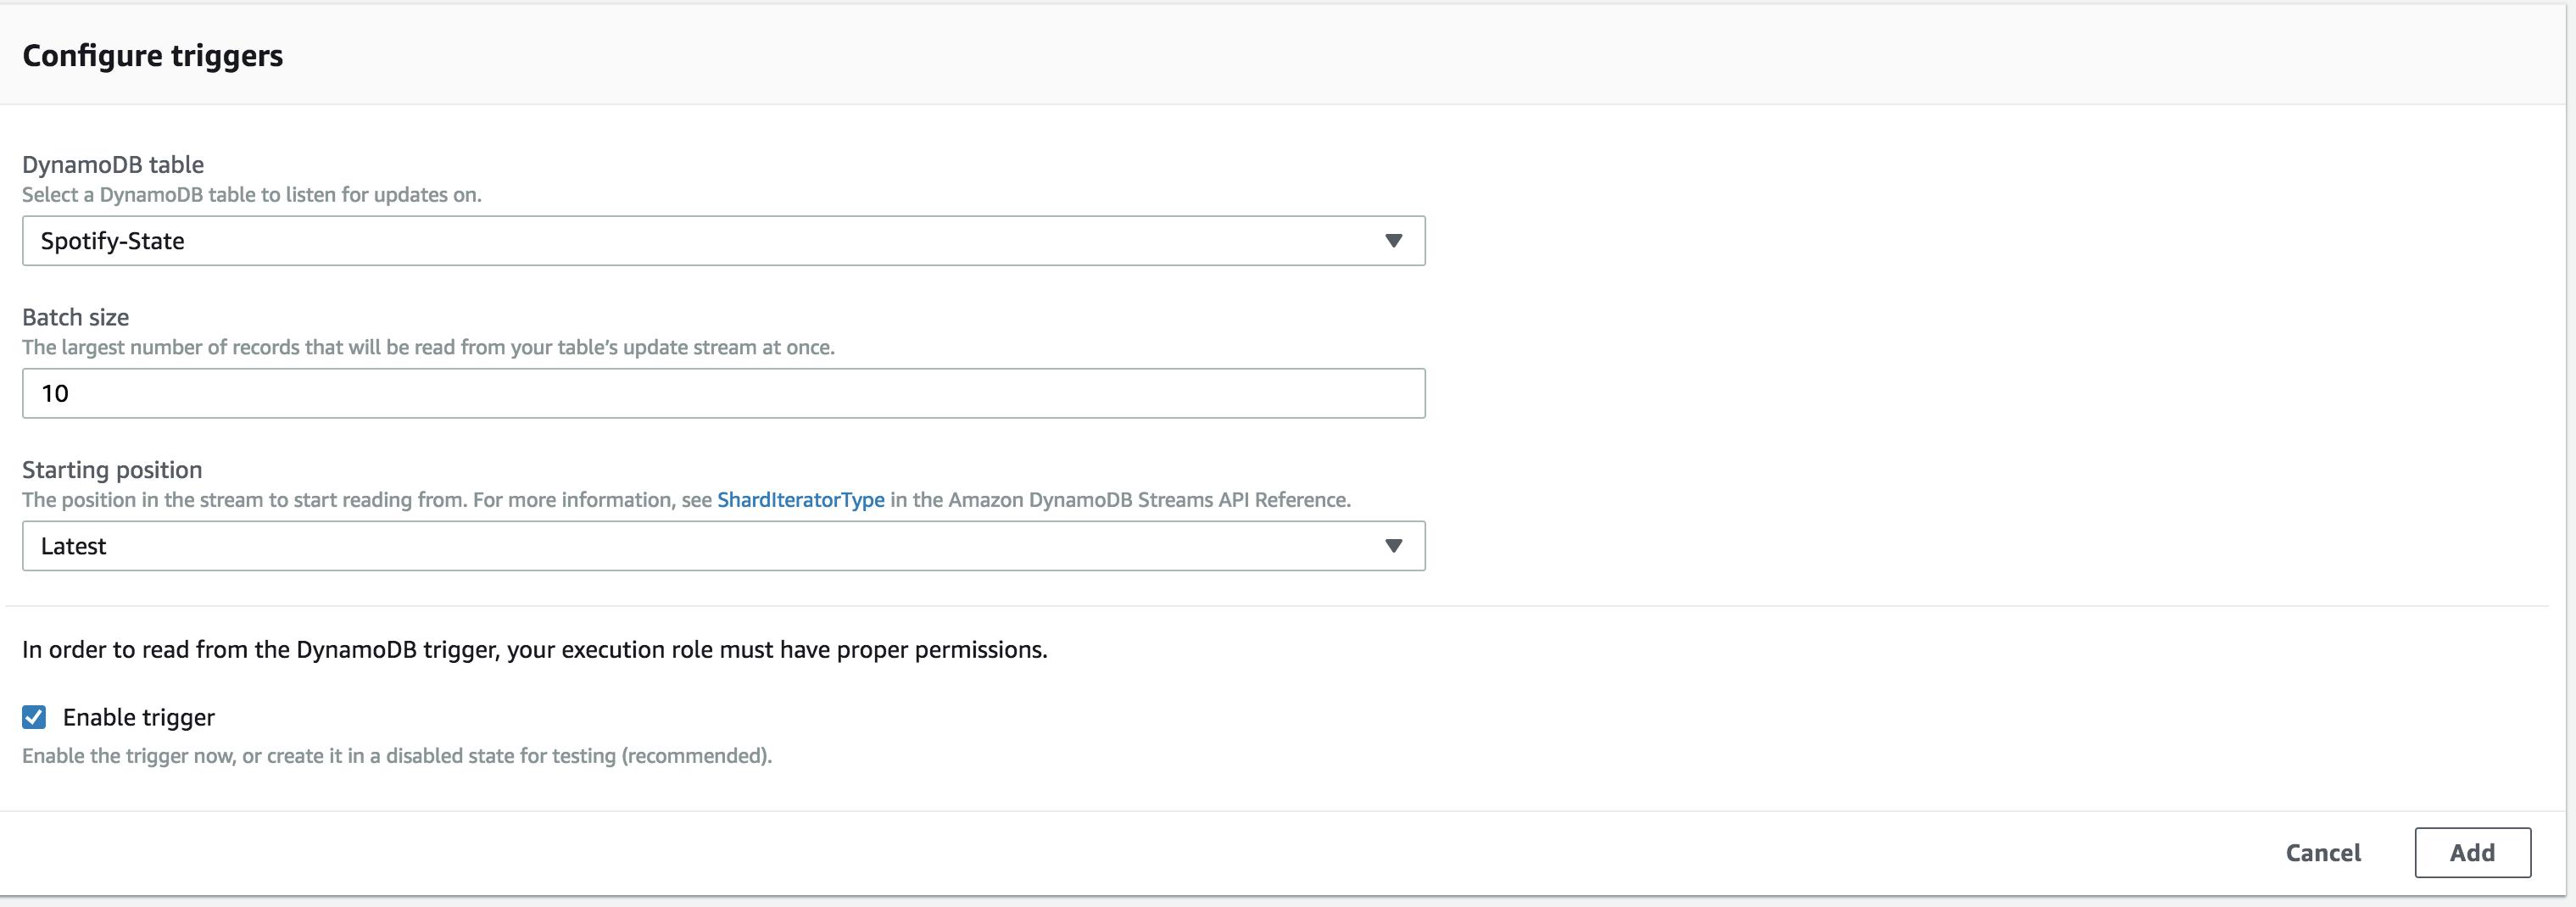
You can then link this table in the Lambda API console under Add triggers => DynamoDB.
API Gateway
Ok - one more piece of setup before we can begin writing our lambda function! We need a way to invoke our function from across the internet. AWS again offers
a service called API Gateway, which translates your lambda function into a REST API.
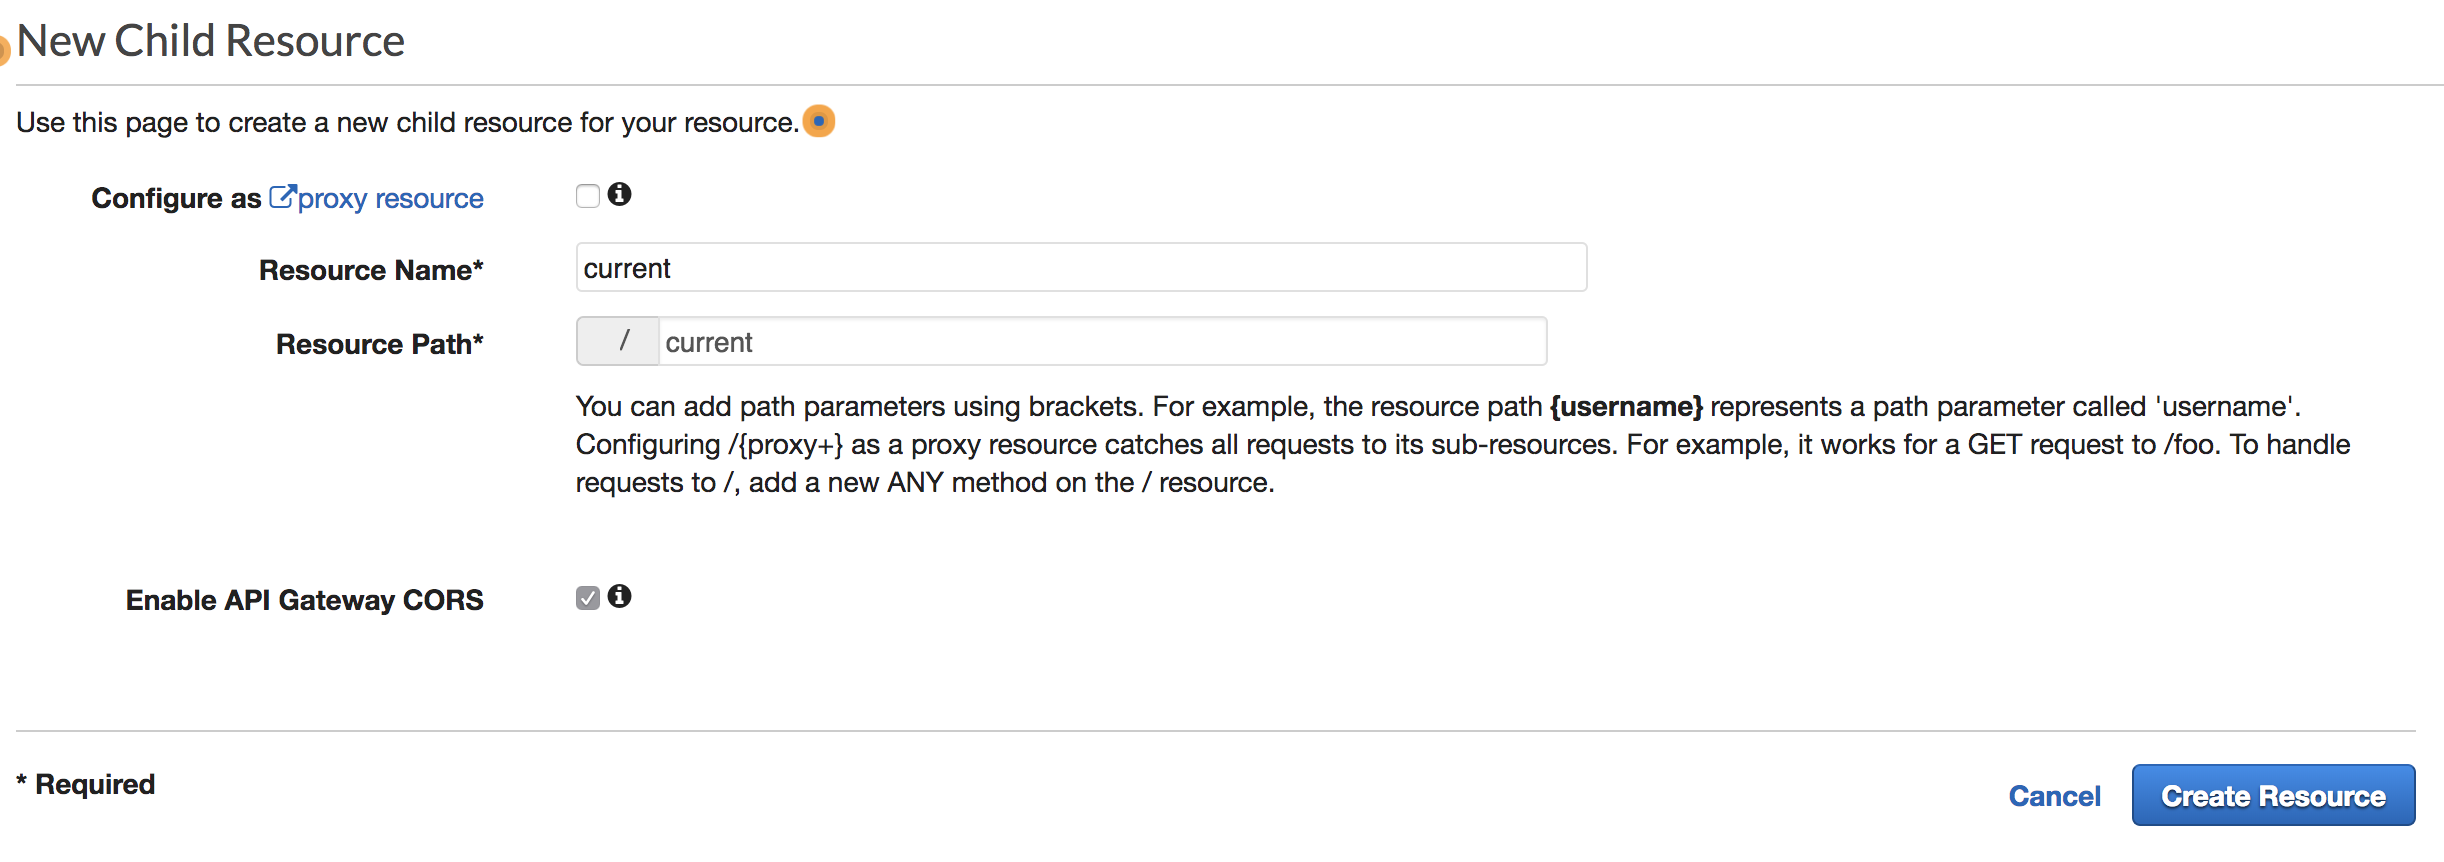
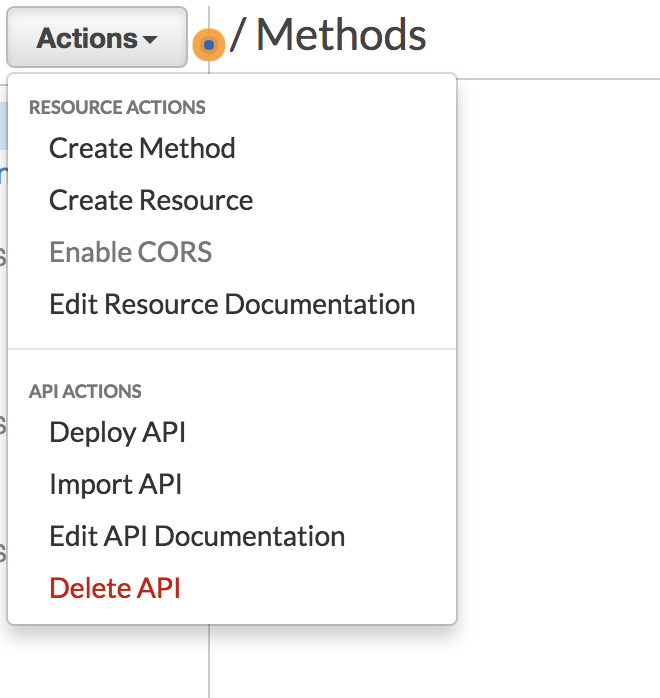
Create a new API that is edge-optimized. After, navigate to your API’s Resources page and create a new resource - I named my endpoint current.
You’ll then want to click on your new resource, and add a GET method to it.
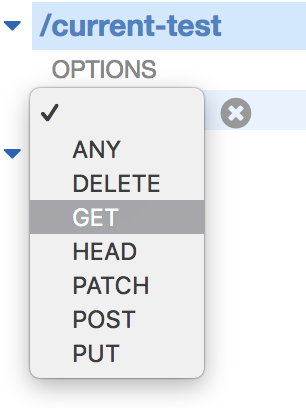
This next page is where you’ll be given the option to point the API to your lambda function. Your function will execute whenever this endpoint is requested.
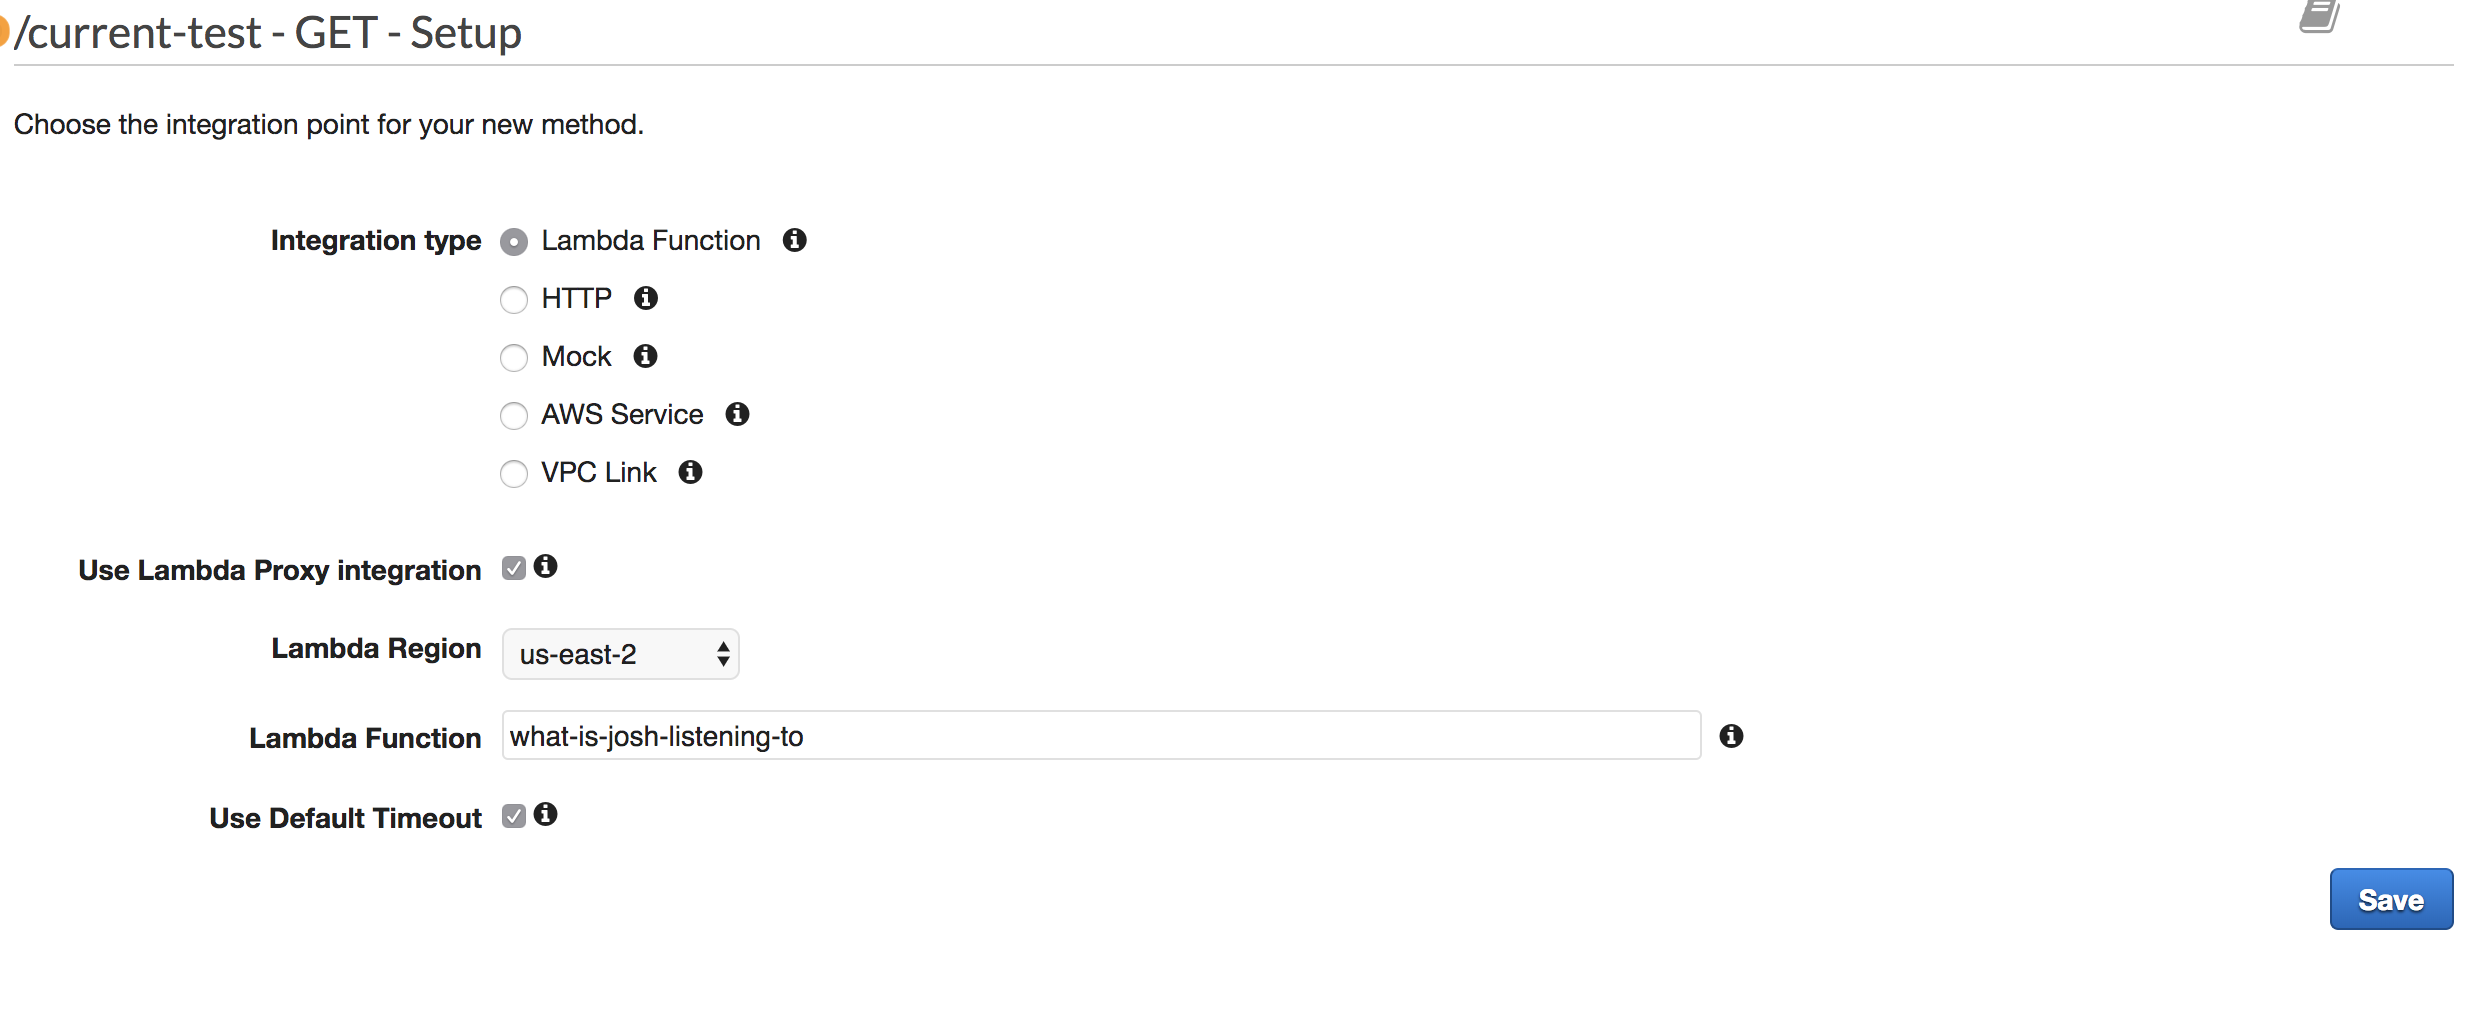
It took me a while to understand why I need “Lambda Proxy” enabled. I found a lot of articles online outlining the pros and cons of using lambda proxy. For me, this setting made it easy for me to return json, and to return appropriate status codes from within my python function.
Optional: Set up DNS
In API Gateway on the left you’ll see “Custom Domain Names”. I mapped my api to https://api.joshspicer.com/ to make it easy to remember. Follow the instructions there
of how to configure your own DNS.
Lambda function
We’re now ready to fill out our lambda_function file!
First, lets import all the packages we need. We’ll import the requests package we already imported, as well as
the Amazon Web Services (AWS) SDK boto3 . Lets also import a couple other default packages we’ll need.
import requests
import time
import boto3
import json
Lets then connect our database with code.
# Connect the DynamoDB database

dynamodb = boto3.resource('dynamodb')
table = dynamodb.Table('SpotifyState')
I also hardcode the refresh token at the top of the file
refreshToken = '<YOUR REFRESH TOKEN>'We will place the rest of our code into a function called lambda_handler(event, context). This function is the main
function that will be executed by Lambda. I place default values up at the top, and retrieve information
from our dynamoDB. I then check if the expiresAt value indicates the access token is expired.
If expired, I call refreshThetoken (see above).
def lambda_handler(event, context):

    # Defaults
    response = "Josh isn't listening to Spotify right now."
    songName = 'n/a'
    artistName = 'n/a'
    isPlaying = False

    # See if "expiresAt" indeed indicates we need a new token.
    # Spotify access tokens last for 3600 seconds.
    dbResponse = table.get_item(Key={'spotify': 'prod'})
    expiresAt = dbResponse['Item']['expiresAt']

    # If expired....
    if expiresAt <= time.time():
        refreshTheToken(refreshToken)

    dbResponse = table.get_item(Key={'spotify': 'prod'})
    accessToken = dbResponse['Item']['accessToken']
Now we have a valid access token. I form the headers necessary to submit the request to Spotify.
    headers = {'Authorization': 'Bearer ' + accessToken,
                   'Content-Type': 'application/json', 'Accept': 'application/json'}

    r = requests.get('https://api.spotify.com/v1/me/player/currently-playing', headers=headers)
The response from Spotify has waaaay too much information.
"context": {
"external_urls" : {
"spotify" : "http://open.spotify.com/user/spotify/playlist/49znshcYJROspEqBoHg3Sv"
},
"href" : "https://api.spotify.com/v1/users/spotify/playlists/49znshcYJROspEqBoHg3Sv",
"type" : "playlist",
"uri" : "spotify:user:spotify:playlist:49znshcYJROspEqBoHg3Sv"
},
"timestamp": 1490252122574,
"progress_ms": 44272,
"is_playing": true,
"item": {
"album": {
"album_type": "album",
"external_urls": {
"spotify": "https://open.spotify.com/album/6TJmQnO44YE5BtTxH8pop1"
},
"href": "https://api.spotify.com/v1/albums/6TJmQnO44YE5BtTxH8pop1",
"id": "6TJmQnO44YE5BtTxH8pop1",
"images": [
{
"height": 640,
"url": "https://i.scdn.co/image/8e13218039f81b000553e25522a7f0d7a0600f2e",
"width": 629
},
{
"height": 300,
"url": "https://i.scdn.co/image/8c1e066b5d1045038437d92815d49987f519e44f",
"width": 295
},
{
"height": 64,
"url": "https://i.scdn.co/image/d49268a8fc0768084f4750cf1647709e89a27172",
"width": 63
}
],
"name": "Hot Fuss",
"type": "album",
"uri": "spotify:album:6TJmQnO44YE5BtTxH8pop1"
},
"artists": [
{
"external_urls": {
"spotify": "https://open.spotify.com/artist/0C0XlULifJtAgn6ZNCW2eu"
},

        {....truncated....}
I then try to unwrap the JSON response from Spotify. Sometimes I can’t get my currently playing song (podcasts aren’t reported correct). If that’s the case, i’ll settle for my last played song.
    # Try currently playing
    try:
        songName = r.json()['item']['name']
        isPlaying = r.json()['is_playing']
        artistName = r.json()['item']['artists'][0]['name']
        if isPlaying:
            response = "Josh is currently listening to " + songName +
                                      " by " + artistName + " on spotify."
    except:
        pass

    # If Josh isn't listening to music, get his last played song.
    if not isPlaying:
        try:
            r2 = requests.get('https://api.spotify.com/v1/me/player/recently-played',
                                                                        headers=headers)
            songName = r2.json()['items'][0]['track']['name']
            artistName = r2.json()['items'][0]['track']['artists'][0]['name']
            response = "Josh last listened to " + songName +
                                        " by " + artistName + " on spotify."
        except:
            pass
Lastly, I return this data and structure it into a simple JSON object.
    return {'statusCode': 200, 'headers': {'Access-Control-Allow-Origin' : "*", 'content-type': 'application/json'},
    'body': json.dumps({'songName': songName, 'isPlaying': isPlaying, 'artistName': artistName, 'response': response})}
My endpoint is https://api.joshspicer.com/spotify/current. If you GET that uri, you’ll see a JSON response.
{
artistName: "Jukebox The Ghost",
isPlaying: false,
response: "Josh last listened to Everybody's Lonely by Jukebox The Ghost on spotify.",
songName: "Everybody's Lonely"
}
Client-side Javascript
You can use this information anyway you’d like. I wanted to utilize Lambda so that I could place dynamic content onto my static webpage hosted on Github Pages.
Here is some javascript to hit our API.
var xhttp = new XMLHttpRequest();
xhttp.onreadystatechange = function() {
if (this.readyState == 4 && this.status == 200) {
res = JSON.parse(this.response);

    // Hide our shame when it all goes wrong.
    if (!res.response) {
      return;
    }

    document.getElementById("spotify").innerHTML = res.response

}
};
xhttp.open("GET", "https://api.joshspicer.com/spotify/current", true);
xhttp.send();
Place the following onto the page you’d like to display your “now playing” line.
<p>
  <span id='spotify'>{default value}</span>
</p>
All done!
Have a comment? Join the discussion
This post helpful? Buy me a coffee!
