Android Hacking with FRIDA
hacking mobile-dev Ever since I was introduced to Frida at an OWASP meetup a few months back,
i’ve really been wanting to experiment and learn more about it. This is my walkthrough
of utilizing Frida to complete OWASP’s 1st “CrackMe” reverse engineering challenge.
Our goal with this “CrackMe” APK is to find a way to extract a “secret string”. I have no idea what this “secret string” is all about,
but i’m sure it’ll be apparent once we get the app running.
I have little experience with Frida, so this will be a complete beginner’s walkthrough. For more detail
on what Frida is, please check our their documentation first.
Prereqs
- Rooted Android Phone
- OWASP’s First CrackMe APK
- Frida
- Frida-Server
- An .apk ==> .jar program
- A Java Decompiler
Check my earlier article for how to root Pixel Phones.
Download the APK and sideload it onto your device. adb install <APK>
Installing Frida
Installing Frida is pretty well-documented over at Frida’s project webpage. I worked off our my Macbook after installing with pip .
frida-server
The easiest way to get up and running is to run the frida-server software directly on your rooted
android phone. I again followed their guide on that. I had difficulty escalating to root
through adb, so I just downloaded a terminal app from the play store, became root through su root, and ran the server
from there.
Get started
We’re now ready to take a look at the .apk we’re testing. Our goal is to reverse engineer the app enough to
uncover the secret key. Our best bet is to see if we can understand what any of the decompiled code is doing.
Start up dex2jar and convert the .apk to a .jar file.
This will let us analyze the .apk as a .jar file and peek inside at the underlying java classes.
tracy:josh$ d2j-dex2jar.sh <UnCrackable APK>
Open that up with Bytecode-Viewer and take a look at the classes we’re working with.
tracy:josh$ java -jar Bytecode-Viewer
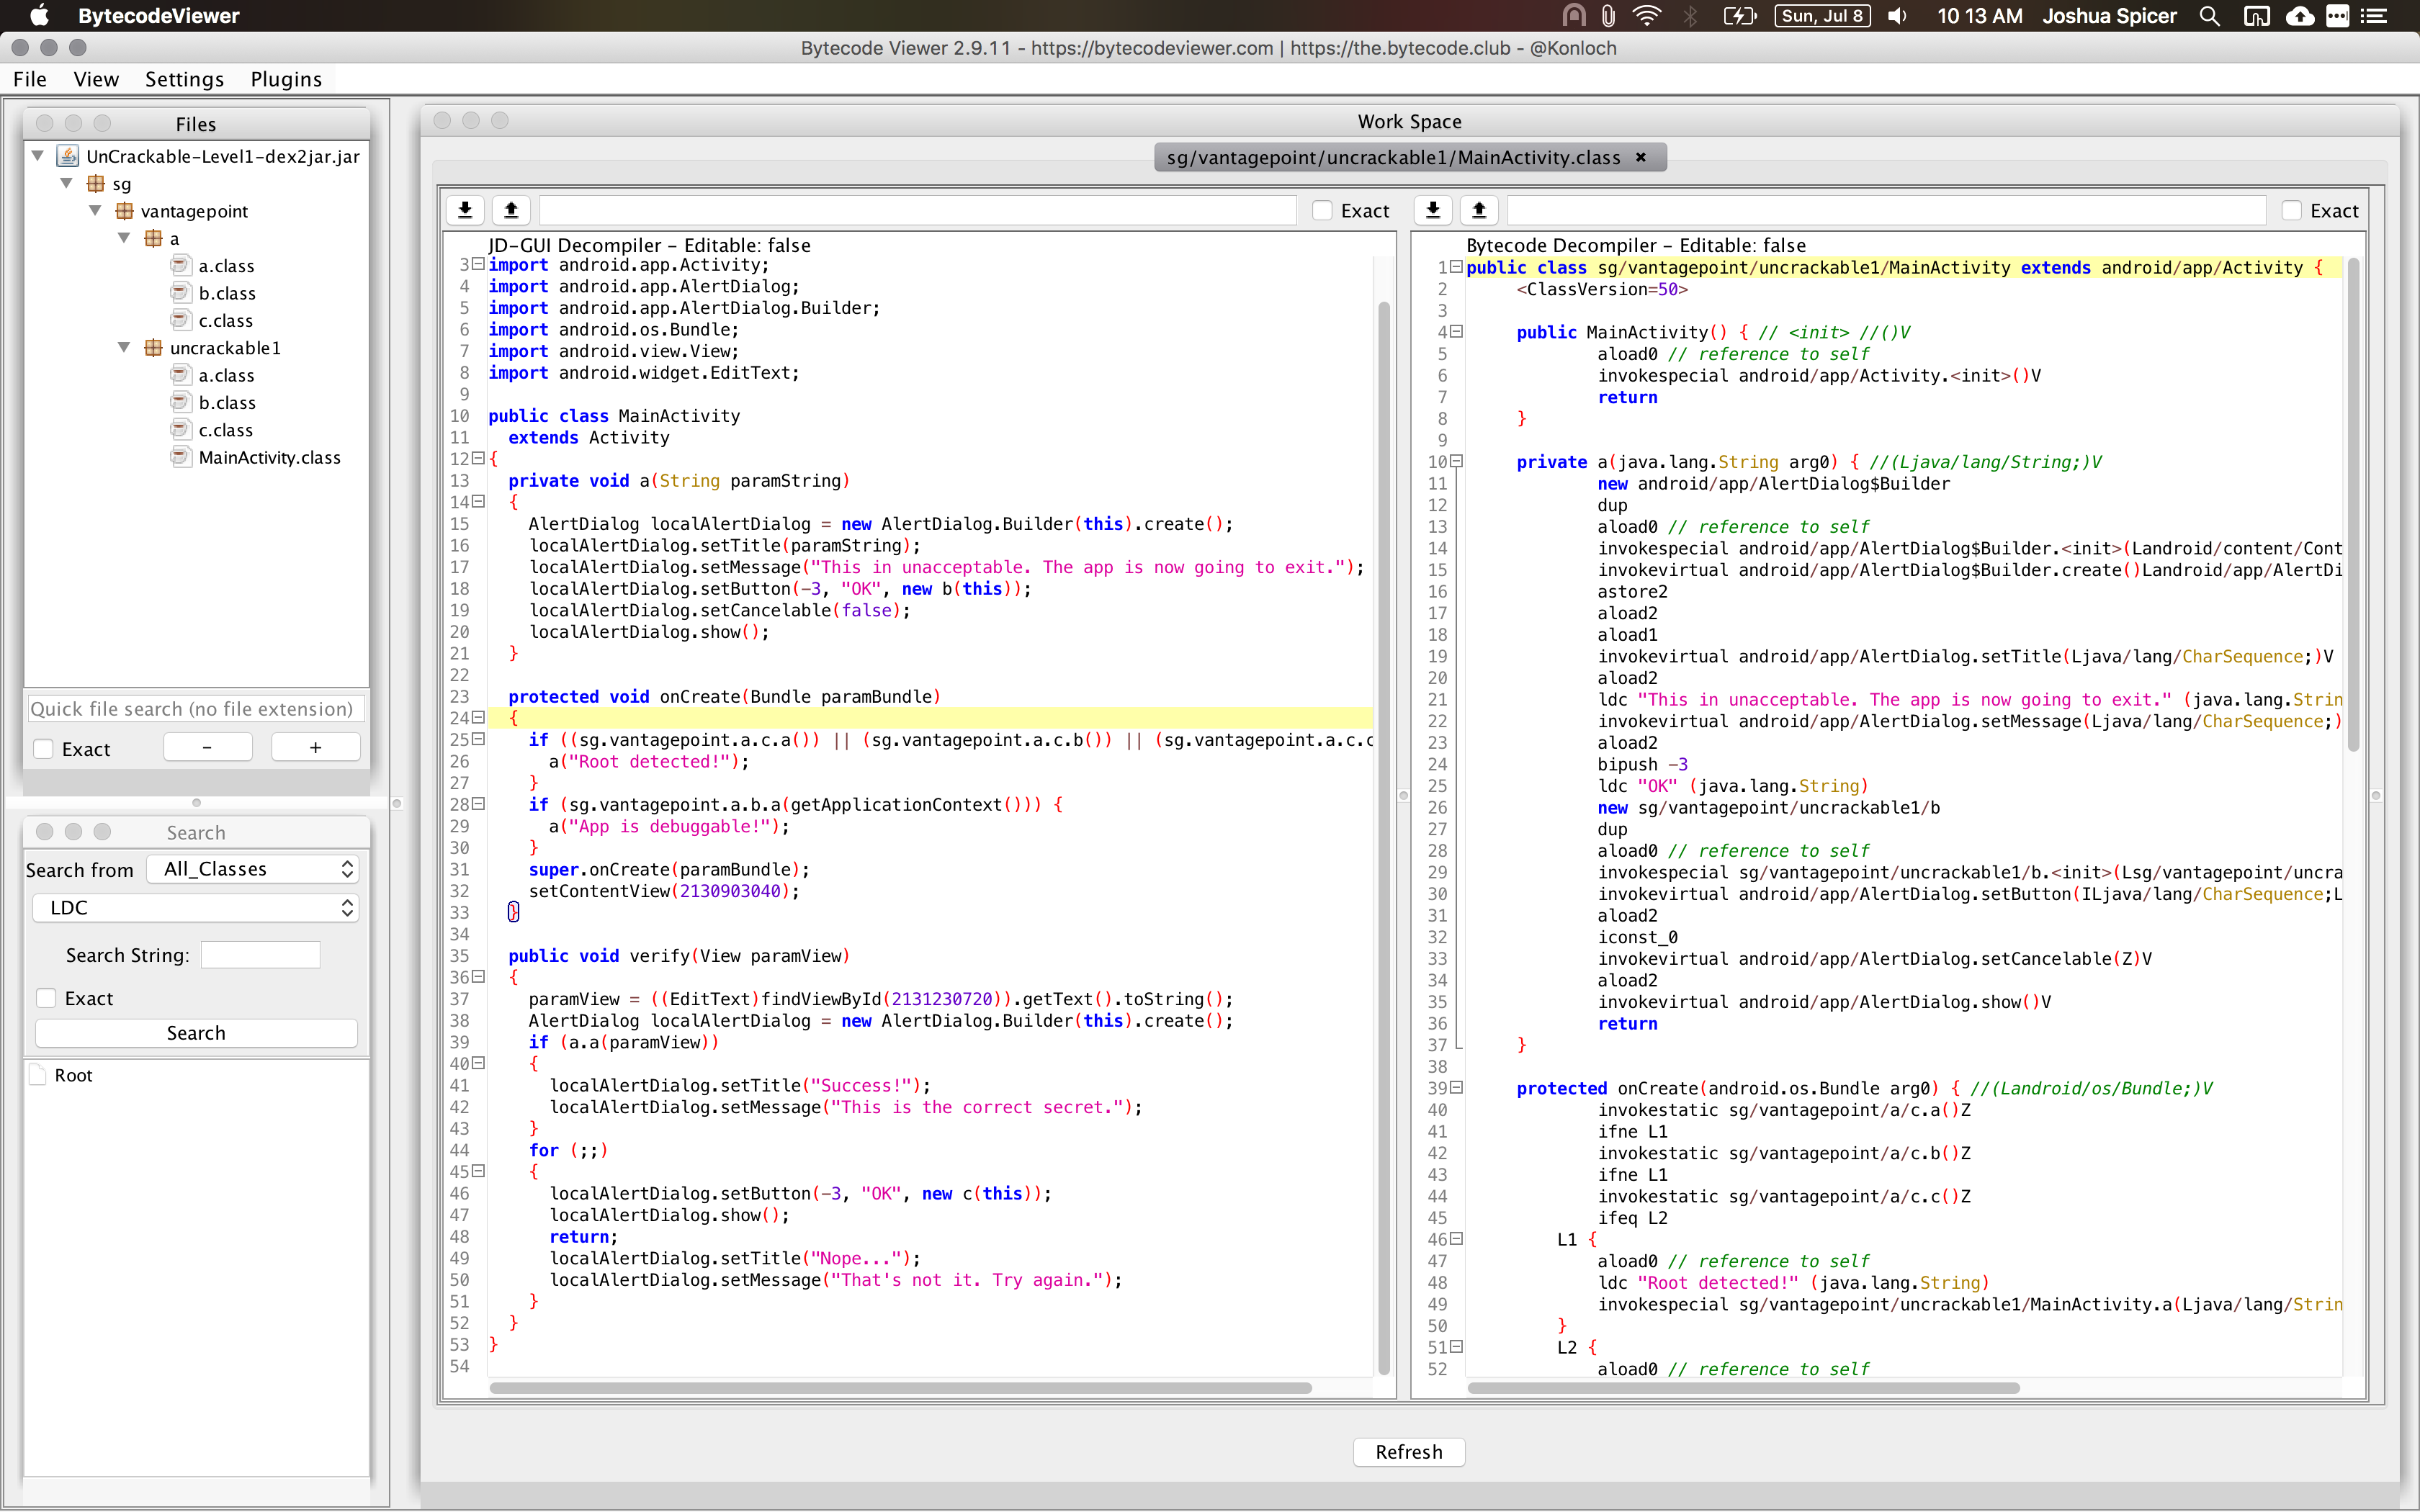
On the left sidebar you’ll see the hierarchical list of classes found in this .apk. Luckily, there’s only a few classes we have to worry about. In the center-left panel is the JD-GUI decompiled output. I’ve found this output to be pretty good, and will be referencing this output for the remainder of the article.
Investigation: Root Detection
Hm, immediately after booting into the Android app, we hit a roadblock. There seems to be some kind of root-detection in this app. We need root to utilize Frida, so we got to figure out a way past this.
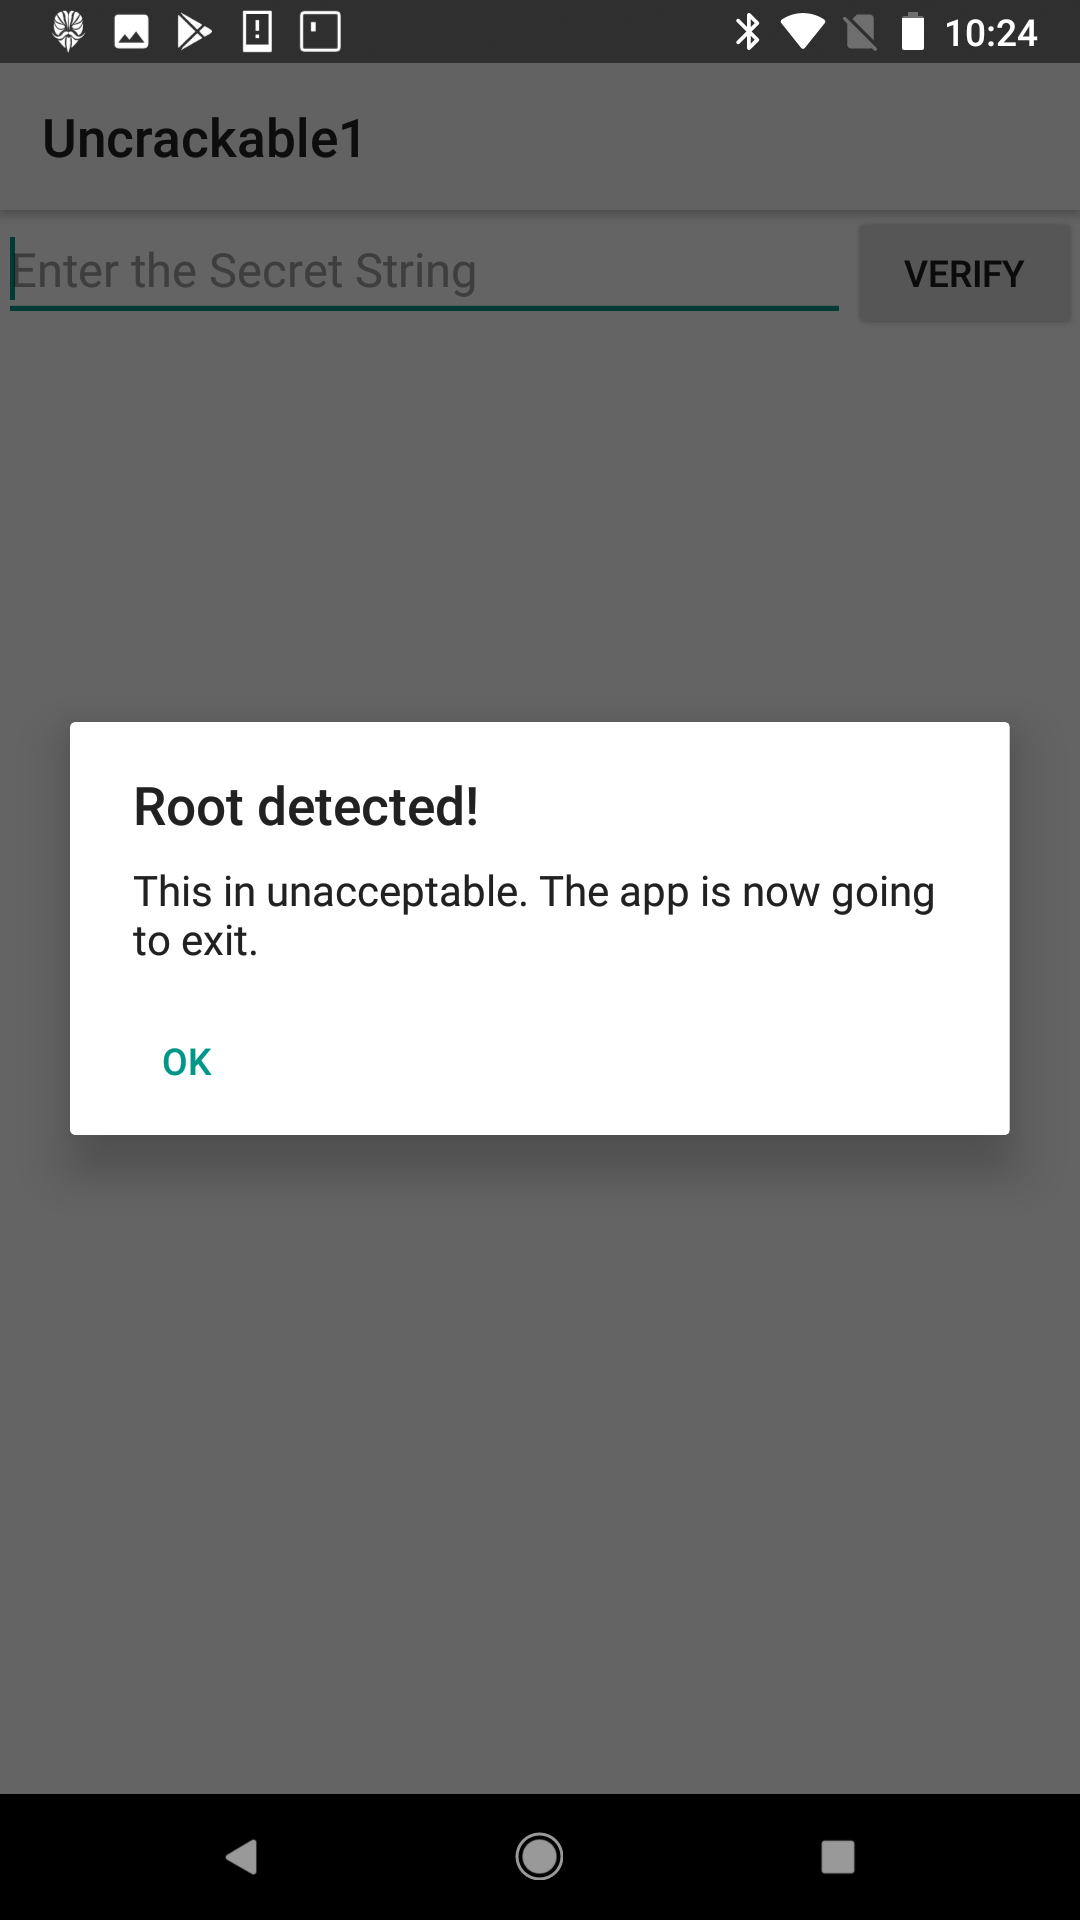
Lets take a peek at the code we just decompiled and see if we can figure out how this dialog box is spawned.
In MainActivity.class, we see where the dialog box “Root detected” is called.
1
2
3
4
5
6
7
protected void onCreate(Bundle paramBundle)
{
if ((sg.vantagepoint.a.c.a()) || (sg.vantagepoint.a.c.b()) || (sg.vantagepoint.a.c.c())) {
a("Root detected!");
}

{.....truncated.....}
So if any of these of methods sg.vantagepoint.a.c.(a|b|c) returns true, root detection
will be triggered. Lets see what these methods are.
In sg.vantage.point.a.c.class:
1
2
3
4
5
6
7
8
9
10
11
12
13
14
15
16
17
18
19
20
21
22
23
24
25
26
27
28
29
30
31
32
33
34
35
36
37
38
39
40
41
42
43
44
45
46
47
48
49
50
51
52
53
54
55
56
57
package sg.vantagepoint.a;

import android.os.Build;
import java.io.File;

public class c
{
public static boolean a()
{
boolean bool2 = false;
String[] arrayOfString = System.getenv("PATH").split(":");
int j = arrayOfString.length;
int i = 0;
for (;;)
{
boolean bool1 = bool2;
if (i < j)
{
if (new File(arrayOfString[i], "su").exists()) {
bool1 = true;
}
}
else {
return bool1;
}
i += 1;
}
}

public static boolean b()
{
String str = Build.TAGS;
return (str != null) && (str.contains("test-keys"));
}

public static boolean c()
{
String[] arrayOfString = new String[7];
arrayOfString[0] = "/system/app/Superuser.apk";
arrayOfString[1] = "/system/xbin/daemonsu";
arrayOfString[2] = "/system/etc/init.d/99SuperSUDaemon";
arrayOfString[3] = "/system/bin/.ext/.su";
arrayOfString[4] = "/system/etc/.has_su_daemon";
arrayOfString[5] = "/system/etc/.installed_su_daemon";
arrayOfString[6] = "/dev/com.koushikdutta.superuser.daemon/";
int j = arrayOfString.length;
int i = 0;
while (i < j)
{
if (new File(arrayOfString[i]).exists()) {
return true;
}
i += 1;
}
return false;
}
}
It’s pretty clear that these three functions all perform different checks to
make a guess if the phone is rooted. Since it doesn’t seem like we actually need these
methods for the functionality of the app, lets overwrite them with Frida to all return false.
Exploitation: Root Detection
Have a look at the Frida Java API before continuing. We will
be using Java.perform to hook and modify the implementation of methods in the class above.
First, lets figure out the name of the apk we’re trying to attach to. I guessed that the app identifer would have
the name “uncrackable” somewhere it in, so I checked all the running processes and grepped for that pattern.
tracy:josh$ frida-ps -U | grep uncrackable
# 15137  sg.vantagepoint.uncrackable1
It worked! I now have the full app identifier and its process ID. Great! Next, lets create
a new text file called disableRoot.js that contains the following payload.
1
2
3
4
5
6
7
8
9
10
11
12
13
14
15
16
17
18
19
20
Java.perform(function() {

       var theClass = Java.use("sg.vantagepoint.a.c");

       theClass.a.implementation = function(v) {
            console.log("In function A");
             return false;
         }
       theClass.b.implementation = function(v) {
           console.log("In function B");
            return false;
        }
      theClass.c.implementation = function(v) {
           console.log("In function C");
            return false;
        }

       console.log("Exploit Complete")

})
In this payload, we call Java.perform, and in its callback we hook the class
that holds our target code. Then for each of the three methods we found earlier,
we overwrite their implementations. The new methods simply return false for
all three cases. The effect is that the if statement in MainActivity.class will now always resolve to false.
Next, I actually execute the payload. Normally it’s necessary to have the app running before hooking
any functions. If we do that, however, the root detection will block us before we have a chance to modify any code.
To get around this, I included -f and --no-pause. These flags control the order of execution, allowing the app to be spawned
automatically, frozen so that the instrumentation can occur, and the automatically continue execution with our modified code.
tracy:josh$ frida -U --no-pause -l disableRoot.js -f sg.vantagepoint.uncrackable1
     ____
    / _  |   Frida 11.0.13 - A world-class dynamic instrumentation toolkit
   | (_| |
    > _  |   Commands:
   /_/ |_|       help      -> Displays the help system
   . . . .       object?   -> Display information about 'object'
   . . . .       exit/quit -> Exit
   . . . .
   . . . .   More info at http://www.frida.re/docs/home/
Spawned `sg.vantagepoint.uncrackable1`. Resuming main thread!
[Google Pixel::sg.vantagepoint.uncrackable1]-> Exploit Complete
In function A
In function B
In function C
Note frida spawns the app and resumes the main thread after changing the functions.
Following our exploit, we can see our function print statements logged.
If --no-pause isn’t set, you will be dropped into a frida shell,
where the program will sit without executing. You can then resume execution by entering %resume into frida shell.
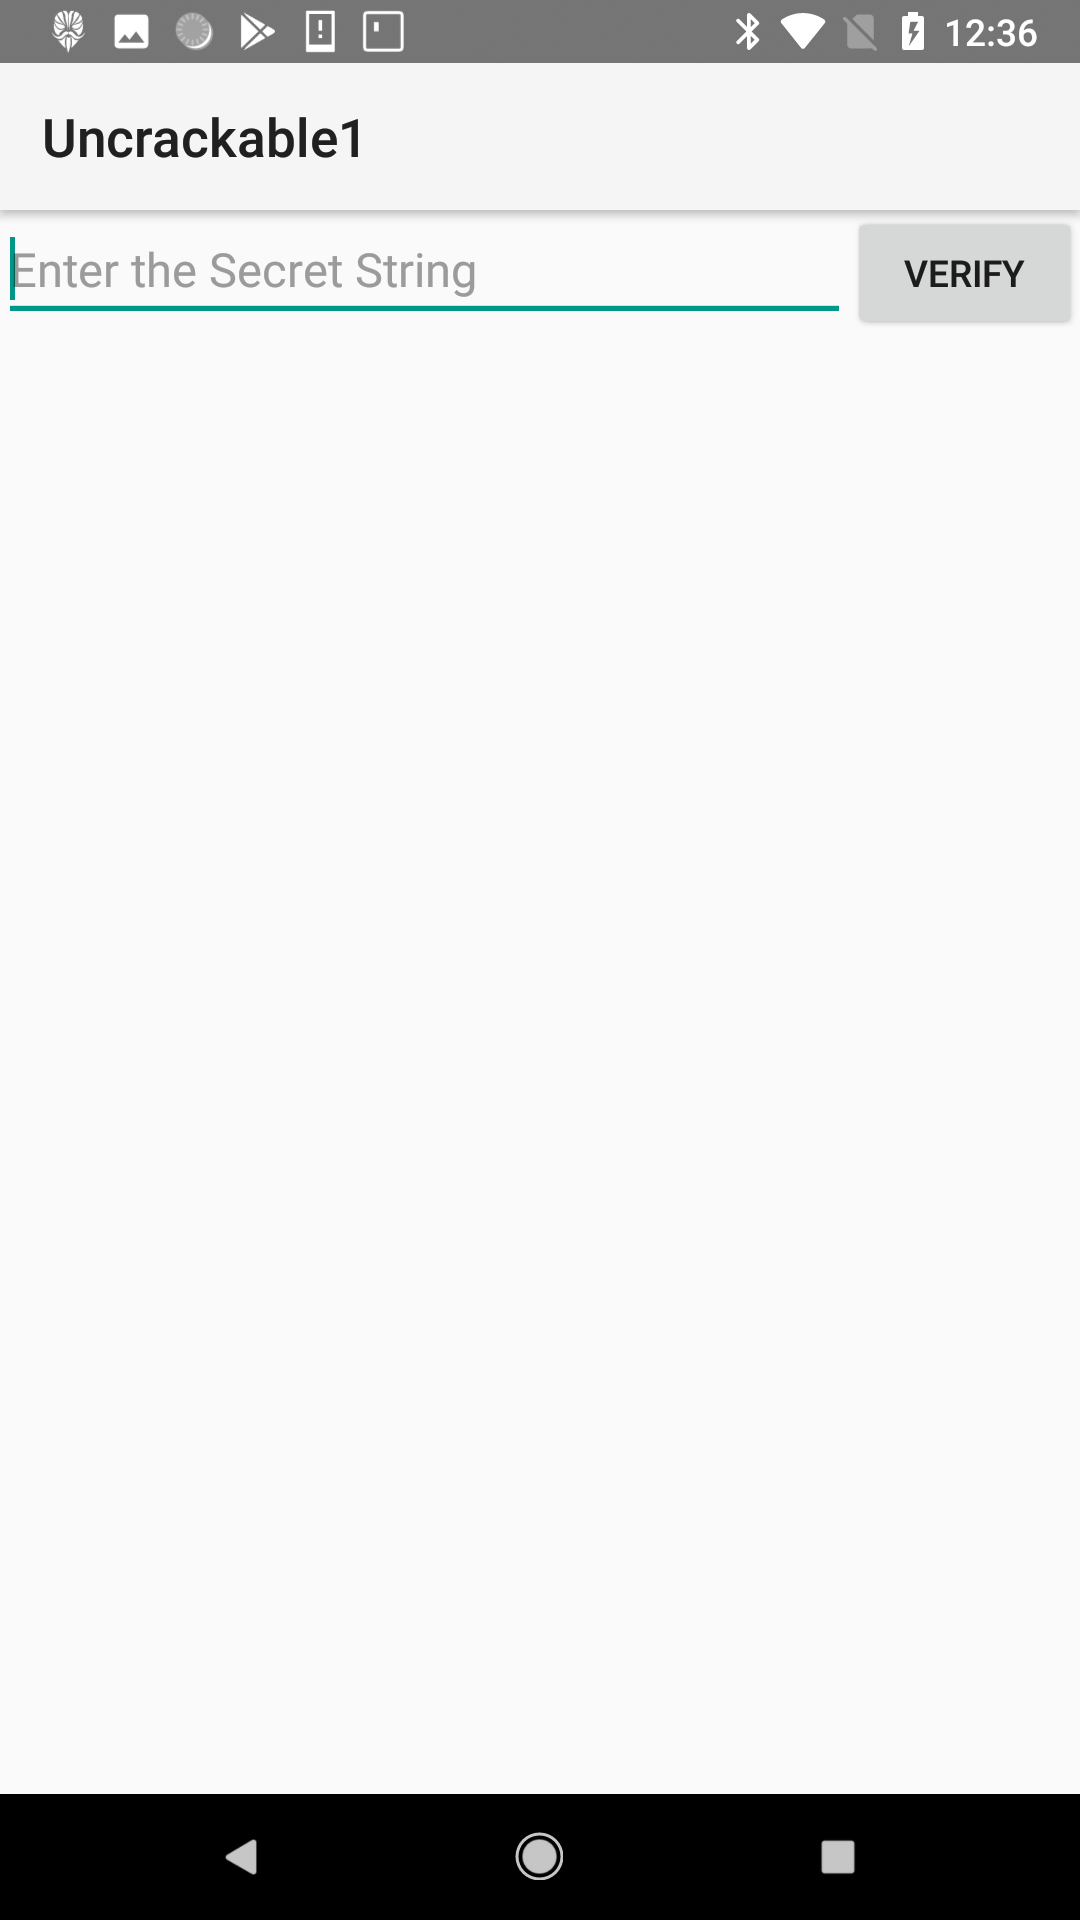
The result is unrestricted access to the app. Frida has allowed us to directly write code on top of what already exists in this
Android app - so cool!
Investigation: Secret String
We’re in the app, but we still need the “secret string” to complete the challenge.
Digging around the app, there’s a couple crypto classes imported into various files.
In MainActivity.class, we have a method called verify() that looks like it corresponds with the “verify” button in the app.
Lets take a look at it.
1
2
3
4
5
6
7
8
9
10
11
12
13
14
15
16
17
18
public void verify(View paramView)
{
paramView = ((EditText)findViewById(2131230720)).getText().toString();
AlertDialog localAlertDialog = new AlertDialog.Builder(this).create();
if (a.a(paramView))
{
localAlertDialog.setTitle("Success!");
localAlertDialog.setMessage("This is the correct secret.");
}
for (;;)
{
localAlertDialog.setButton(-3, "OK", new c(this));
localAlertDialog.show();
return;
localAlertDialog.setTitle("Nope...");
localAlertDialog.setMessage("That's not it. Try again.");
}
}
This looks like it gets the text from the input box, and checks it’s value by
calling a.a(paramView). If that result is true, we get a dialog box telling us “Success”!
Lets now take a look at that method’s implementation.
1
2
3
4
5
6
7
8
9
10
11
12
13
14
15
16
17
18
19
20
public class a
{
public static boolean a(String paramString)
{
byte[] arrayOfByte2 = Base64.decode("5UJiFctbmgbDoLXmpL12mkno8HT4Lv8dlat8FxR2GOc=", 0);
byte[] arrayOfByte1 = new byte[0];
try
{
arrayOfByte2 = sg.vantagepoint.a.a.a(b("8d127684cbc37c17616d806cf50473cc"), arrayOfByte2);
arrayOfByte1 = arrayOfByte2;
}
catch (Exception localException)
{
for (;;)
{
Log.d("CodeCheck", "AES error:" + localException.getMessage());
}
}
return paramString.equals(new String(arrayOfByte1));
}
As you can see, this method is just comparing the value we inputted with a string generated by this line:
sg.vantagepoint.a.a.a(b("8d127684cbc37c17616d806cf50473cc"), arrayOfByte2);With frida we have the ability to call any function we’d like. Lets try to get the app to print the password for us, instead of feeding it into the variable in the function above.
Exploitation: Secret String
Originally I started writing code to get me the values for the arguments of sg.vantagepoint.a.a.a().
I was then going to call the method myself with those calculated values.
After some difficulty, I realized I was doing way too much work! The app is eventually going to call the function anyway
with those arguments. All I need to do is wait for that to happen, and take a peak at the password before letting the app
continue execution. Frida lets you sit in the middle, even letting you pass and inspect the variables.
Here is the complete code to my new javascript payload titled crack.js. Note the helper function at the top,
which simply converts the byte array into a string we can easily read.
1
2
3
4
5
6
7
8
9
10
11
12
13
14
15
16
17
18
19
20
21
22
23
24
25
26
27
28
29
30
31
32
33
34
35
36
37
38
39
40
41
42
43
44
45
46
47
//Helper function to decode byte[] to String
function arrToStr(byteArr) {
var tmp = "";
for (var k = 0; k < byteArr.length; k++) {
tmp += String.fromCharCode(byteArr[k]);
}
return tmp;
}

// Java.perform wraps all of our Frida code.
Java.perform(function() {
//
var classAC = Java.use("sg.vantagepoint.a.c");

classAC.a.implementation = function(x) {
console.log("In function A");
return false;
};
classAC.b.implementation = function(x) {
console.log("In function B");
return false;
};
classAC.c.implementation = function(x) {
console.log("In function C");
return false;
};

console.log("Root Bypass Complete");

// ---- vv ------- Part 2 ----- vv ----- //

console.log("Finding Password....");

var classAA = Java.use("sg.vantagepoint.a.a");
// Method a() in a.a
classAA.a.implementation = function(x1, x2) {
console.log("In function a.a.a()");
// Call this function and store its return value
//x1 and x2 are the variables the _app_ is calling with.
var rawFunctionCall = this.a(x1, x2);
// Convert Byte[] to String
var output = arrToStr(rawFunctionCall);
// Log the password.
console.log("=====> " + output);
return rawFunctionCall;
};
});
The code below the part 2 comment sits and waits for function a.a.a() to be called.
When the function is called like normal, we shortstop the result and print it. One final step that must be done before printing is to convert the byte array to a string, which is done with
a simple for loop.
Now run frida again with our new payload and the same flags.
We need to trigger function sg.vantagepoint.a.a.a() to run naturally
in the app. You can do this by typing in an arbitrary password and pressing verify in the app. Doing so
should trigger our new code and print the decrypted password in the console!
tracy:josh$ frida -U --no-pause -l crack.js -f sg.vantagepoint.uncrackable1
____
/ _ | Frida 11.0.13 - A world-class dynamic instrumentation toolkit
| (_| |
> _ | Commands:
/_/ |_| help -> Displays the help system
. . . . object? -> Display information about 'object'
. . . . exit/quit -> Exit
. . . .
. . . . More info at http://www.frida.re/docs/home/
Spawned `sg.vantagepoint.uncrackable1`. Resuming main thread!
[Google Pixel::sg.vantagepoint.uncrackable1]-> Root Bypass Complete
Finding Password....
In function A
In function B
In function C
In function a.a.a()
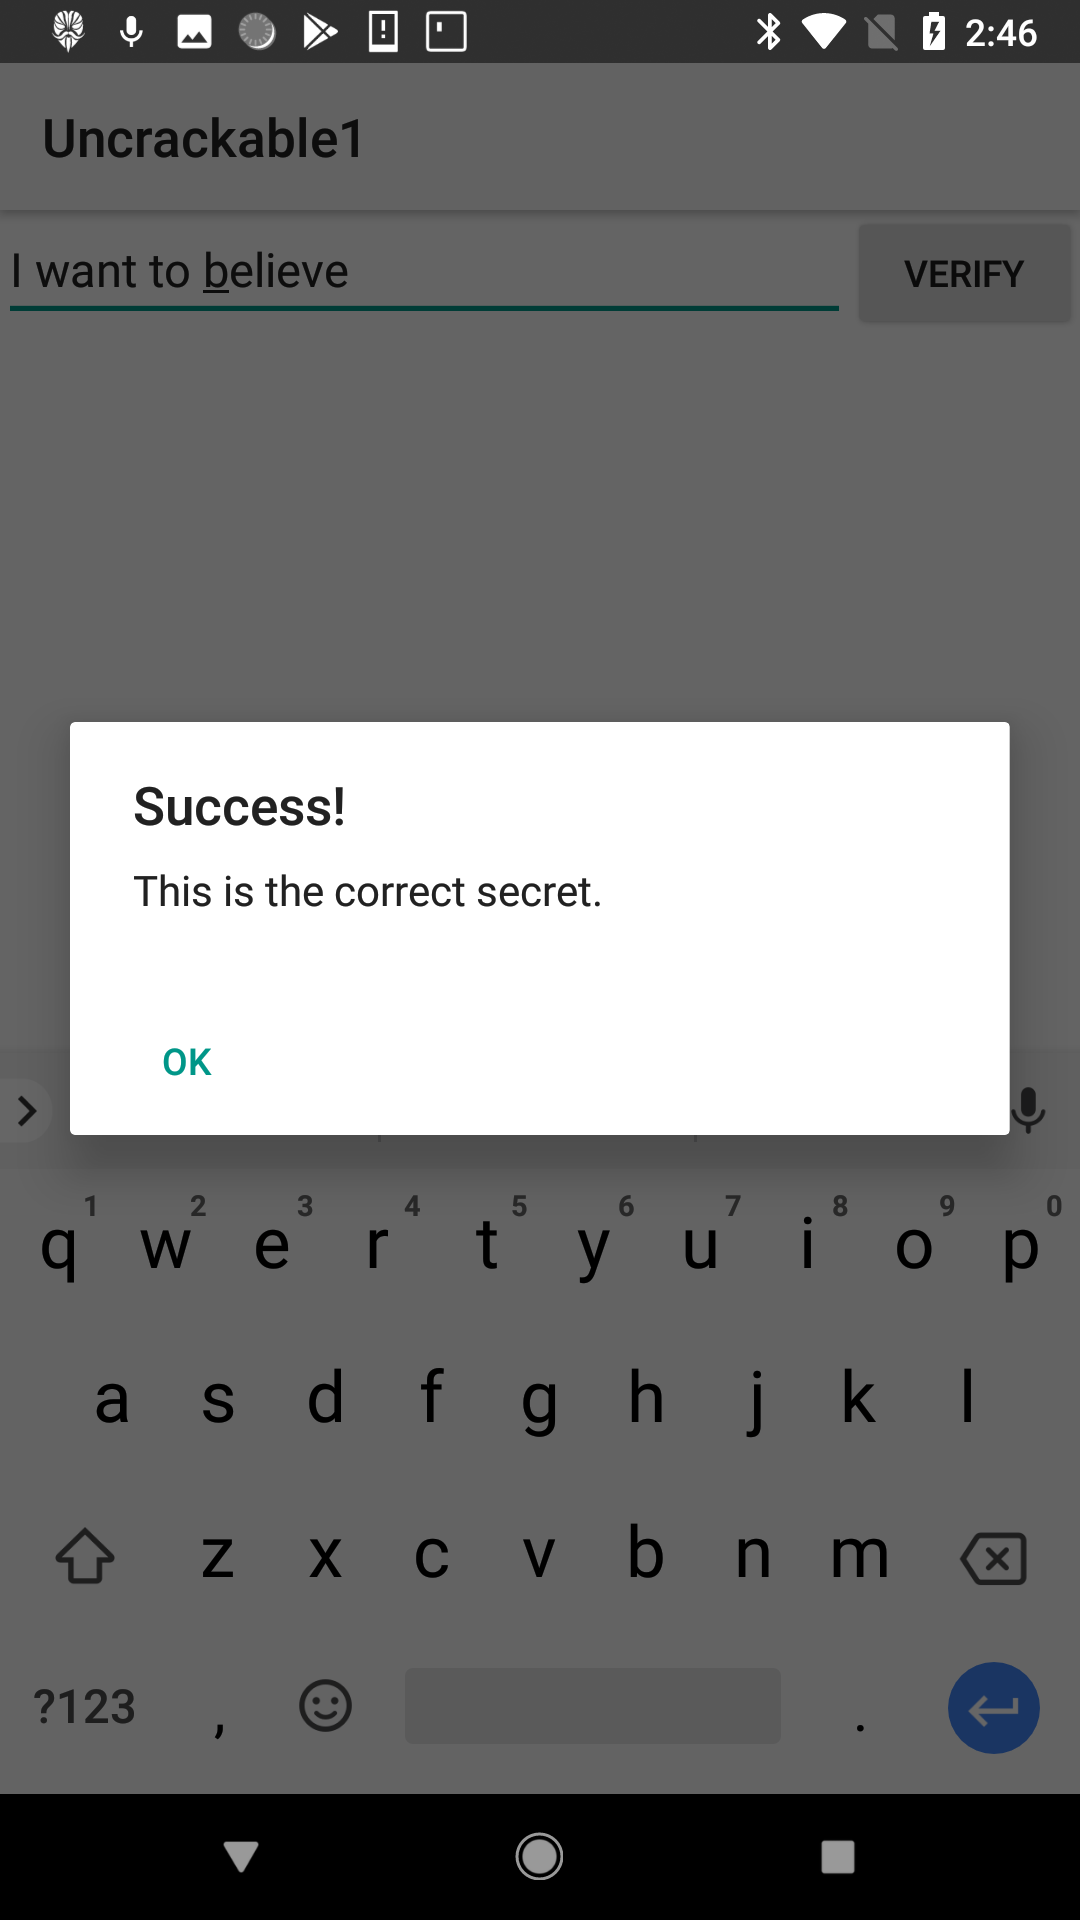
=====> I want to believe
Lets test this password. Run the app with just the root busting code (like we did earlier) and type
in the password I want to believe.
Conclusion
I hope this guide has helped illustrate the power of Frida. I definitely learned a ton
by working through this problem.
We’ve only scratched the surface of what Frida can accomplish. There are two more OWASP test
apps in this series - I hope to tackle them soon.
Have a comment? Join the discussion
This post helpful? Buy me a coffee!